How Long Does It Take To Swap An Engine Engine Swap Time Guide
Swapping an engine is a task many car enthusiasts and repair shops undertake to breathe new life into a vehicle. Whether you’re upgrading for performance or replacing a failing engine, understanding the time commitment is essential for planning.
The time it takes to swap an engine varies, but on average, it ranges from 8 to 15 hours for professionals. Factors such as vehicle type, engine complexity, and experience level play a significant role in determining the duration.
Understanding Engine Swap Basics

What is an Engine Swap?
An engine swap involves removing the existing engine from a vehicle and replacing it with another. This process can be straightforward or complex, depending on the compatibility of the new engine with the vehicle. Swapping engines isn’t just about changing the power unit; it often requires modifications to the vehicle’s electrical systems, cooling, and exhaust.
Common Reasons for Engine Swaps
- Performance Enhancement: Enthusiasts often swap engines to increase horsepower and torque, improving overall vehicle performance.
- Engine Failure: Replacing a malfunctioning engine can be more cost-effective than purchasing a new car.
- Fuel Efficiency: Some swaps aim to install more efficient engines to reduce fuel consumption.
- Restoration: Classic car restorers might use engine swaps to return a vehicle to its original specifications.
Swapping an engine can be a rewarding undertaking for those looking to enhance their vehicle’s performance, address mechanical issues, or achieve specific project goals. The time required for an engine swap varies, influenced by factors such as the type of vehicle, the new engine’s compatibility, and the skill level of the person doing the work.
Pre-Swap Preparations
Before embarking on an engine swap, thorough preparations can significantly impact the process’s efficiency and outcome. These preparations are essential to ensure safety and avoid unnecessary delays.
Necessary Tools and Equipment
A successful engine swap requires a well-stocked toolbox. Ensure you have:
- Engine Hoist: Hydraulic hoist or crane to lift the engine safely.
- Basic Hand Tools: Wrenches, sockets, screwdrivers, and pliers.
- Torque Wrench: To apply the correct torque to bolts and nuts.
- Jack Stands: For safely supporting the vehicle when elevated.
- Fluid Draining Equipment: For safely removing old oil and coolant.
Choosing the Right Engine Type
Selecting the appropriate engine is a pivotal step. Consider:
- Compatibility: Ensure the engine fits the vehicle’s specifications and mounts.
- Performance Requirements: Choose an engine that meets your performance goals.
- Budget: Factor in both the purchase cost and potential additional parts needed.
By diligently preparing with the right tools and a suitable engine, you set the stage for a smoother engine swap process.
Removing the Old Engine

Disconnecting Components
Begin by disconnecting all components linked to the engine. This includes electrical connections, fuel lines, exhaust systems, and coolant hoses. Label each connection to ensure a smooth reassembly later.
- Battery: Always disconnect the battery first to prevent electrical shorts.
- Fluids: Drain engine oil, coolant, and transmission fluid to avoid spills.
- Exhaust: Remove the exhaust manifold from the engine block.
Remember, a systematic approach can save time and frustration.
Lifting the Engine Out
With all components disconnected, proceed to lift the engine out of the vehicle. This step requires an engine hoist or crane.
Tip: Double-check that nothing is still attached to the engine before lifting.
- Mounting Bolts: Remove all engine mounting bolts. Secure them for reinstallation.
- Hoist: Attach the hoist’s chains to the engine lifting points. Ensure they are secure and balanced.
- Lifting: Slowly lift the engine, monitoring for any signs of stress or remaining connections.
After lifting, carefully place the engine on a suitable stand to inspect it or prepare for the new engine installation.
Installing the New Engine
Positioning the Engine
Start by ensuring the engine bay is clean and free of any debris. Use an engine hoist to lift the new engine, aligning it with the engine mounts. Carefully lower the engine, ensuring it sits squarely on the mounts. Secure the engine by tightening the mounting bolts to the manufacturer’s torque specifications. This step is crucial to ensure safety and performance.
Reconnecting Components
Once the engine is securely mounted, begin reconnecting the various components:
- Exhaust System: Connect the exhaust manifold to the engine, ensuring all gaskets are seated properly to prevent leaks.
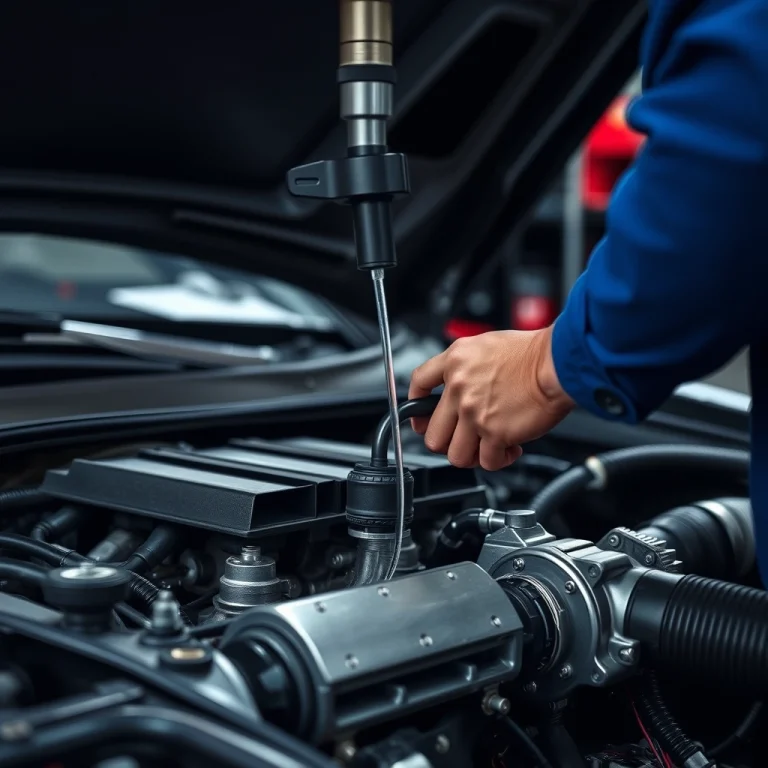
- Electrical Connections: Reattach all wiring harnesses and sensors, following the diagram to ensure correct connections. Double-check grounds and power connections.
- Fuel System: Connect the fuel lines, taking care to install new o-rings or gaskets to prevent leaks.
- Cooling System: Attach the radiator hoses and fill the system with coolant. Check for leaks as the system pressurizes.
- Intake System: Connect the air intake and filter, ensuring all clamps are tight.
After all components are reconnected, perform a thorough inspection to confirm everything is securely fastened and connected. Finally, fill the engine with the recommended oil and check other fluid levels, such as transmission and power steering fluids.
Testing and Troubleshooting

Initial Startup Procedures
After installing a new engine, the initial startup is crucial for ensuring everything operates correctly. Follow these steps:
- Check Fluid Levels: Ensure all engine fluids, including oil, coolant, and transmission fluid, are filled to the required levels.
- Inspect Connections: Double-check all electrical connections, hoses, and belts for proper installation.
- Prime the Fuel System: If the engine is fuel-injected, prime the fuel system to remove air from the lines.
- Start the Engine: Turn the ignition key to start the engine. Listen for any unusual noises that may indicate a problem.
- Monitor Gauges: Keep an eye on the oil pressure and temperature gauges to ensure the engine is operating within normal parameters.
Addressing Common Issues
During the initial start and test drive, some issues may arise. Here’s how to address them:
- Rough Idle or Stalling: This could be due to a vacuum leak or incorrect timing. Check for loose hoses or verify the timing settings.
- Overheating: Ensure the cooling system is free of air pockets and the thermostat is functioning properly. Confirm the radiator and fans are in good condition.
- Unusual Noises: Clanking or knocking sounds might indicate loose components. Re-inspect and tighten any loose parts.
- Warning Lights: If dashboard warning lights illuminate, use an OBD-II scanner to diagnose and resolve the issue.
After resolving any issues, perform a short test drive. Pay attention to the engine’s performance and address any new concerns promptly.
Time Factors Influencing Engine Swaps
Several factors influence the time required to swap an engine, ranging from the type of vehicle to the experience level of the person performing the swap. Understanding these factors can help you plan more effectively.
Vehicle Type Considerations
Different vehicles present unique challenges during an engine swap. For instance, a straightforward swap in a standard sedan might take less time compared to a more complex swap in a modern SUV with advanced electronics.
- Engine Accessibility: Some vehicles have easily accessible engines, while others might require the removal of additional components.
- Compatibility: If the replacement engine is not identical, modifications may be necessary, extending the swap time.
Experience Level Impact
The skill level of the person performing the swap significantly affects the duration. An experienced mechanic may complete the task more quickly compared to a novice.
- Tools and Equipment: Experienced professionals often have access to specialized tools that can expedite the process.
- Knowledge: Familiarity with the specific vehicle model can reduce trial and error, saving time.
Tip: If you’re new to engine swaps, consider getting assistance from a seasoned mechanic to avoid unnecessary delays and errors.
On average, an engine swap can take anywhere from 8 to 15 hours. However, this duration can vary based on the factors mentioned above. Proper planning and preparation can help streamline the process, allowing for a more efficient swap.
Professional vs. DIY: Time Comparisons
Benefits of Professional Services
Engaging a professional for an engine swap can save considerable time. Most shops can complete an engine swap in about 10 to 15 hours spread over a few days, depending on vehicle type and complexity. Professionals have access to specialized tools and a team of experienced mechanics, which streamlines the process. This option minimizes the risk of errors and unexpected delays that can occur with a DIY approach.
DIY Time Estimations
For those opting to perform the swap themselves, expect a significant time investment. A DIY engine swap typically takes 20 to 50 hours, varying with skill level and tool availability. Beginners should anticipate spending closer to the higher end of this range. Without professional-grade tools and facilities, tasks such as lifting the engine and aligning components can be more time-consuming.
Tip: Create a detailed checklist of all necessary parts and tools before starting. This preparation can reduce time spent on unplanned trips to the store.
Post-Swap Maintenance
Swapping an engine is only part of the process. Ensuring the longevity and reliability of the new engine involves post-swap care.
Break-in Period Guidelines
A newly swapped engine requires a break-in period to settle into its new environment. Follow these guidelines to ensure optimal performance:
- Initial Oil Change: Replace the oil after the first 500 miles. This removes any metal shavings and contaminants from the bedding process.
- Drive Moderately: Avoid high RPMs and full-throttle accelerations for the first 1,000 miles. This helps internal components wear evenly.
- Monitor Fluids: Regularly check engine oil, coolant, and other fluids to detect any leaks or irregularities early.
Scheduled Maintenance Tips
Regular maintenance is key to a healthy engine post-swap. Include these checks in your routine:
- Regular Oil Changes: Follow the manufacturer’s recommendation, typically every 3,000 to 5,000 miles.
- Inspect Belts and Hoses: Check for wear and tear, ensuring they are in good condition to prevent breakdowns.
- Exhaust System: Ensure there are no leaks, as these can affect engine performance and fuel efficiency.
- Spark Plugs and Filters: Replace as needed to maintain efficient combustion and clean air intake.
By adhering to these post-swap maintenance practices, you ensure that your engine remains in excellent condition, providing reliable performance and longevity.
Quick Summary
- Swapping an engine typically takes between 8 to 15 hours, depending on the vehicle type and engine complexity.
- Professional mechanics can often complete the task more quickly due to their experience and access to specialized tools.
- DIY enthusiasts should plan for additional time, potentially a full weekend, as they may encounter unexpected challenges.
- Essential pre-swap steps include gathering the necessary tools, obtaining a compatible engine, and reviewing the vehicle’s service manual.
- Post-installation checks are crucial to ensure everything is functioning correctly, including testing for leaks and ensuring all connections are secure.
- It’s advisable to have a clear workspace and organize all parts and tools before beginning the swap to streamline the process.
- Consider consulting with a professional or a knowledgeable friend if you encounter difficulties during the swap process.
Frequently Asked Questions
How long does it typically take to swap an engine?
The duration can vary widely, but a professional shop might complete an engine swap in about 8 to 15 hours, depending on the complexity and model of the vehicle.
What factors influence the time needed for an engine swap?
Key factors include the type of engine, the vehicle’s make and model, the availability of tools and parts, and the mechanic’s experience.
Is it possible to swap an engine over a weekend?
While ambitious, a weekend swap is feasible for straightforward projects with proper preparation and an experienced team, but unexpected issues could extend the timeline.
How can I ensure a smooth engine swap process?
Preparation is crucial: gather all necessary parts, tools, and manuals beforehand, and consult with an experienced mechanic if possible.
Are there any common delays in engine swaps?
Yes, common delays include difficulty removing old components, unexpected part requirements, and compatibility issues with the new engine.
- Find the Right Engine Oil for Your Car: A Quick Guide - March 1, 2026
- Car Battery Booster Basics: Start Your Vehicle in Minutes - March 1, 2026
- How Long Does It Take To Charge A Motorcycle Battery Charging Time Guide - February 28, 2026