How To Adjust Electric Brakes On A Trailer For Diy Enthusiasts
Adjusting electric brakes on a trailer might seem daunting, but with the right guidance, even a curious DIY enthusiast can handle it. Understanding how to properly adjust these brakes ensures safer towing and a smoother driving experience.
Key steps include: testing the brake controller, manually adjusting the brake shoes, and checking the brake responsiveness. This process enhances control and reduces wear on your trailer’s braking system.
Understanding Electric Trailer Brakes
How Electric Brakes Work
Electric trailer brakes are designed to help control the motion of a trailer by using an electrical current to create friction. When the brake controller in the towing vehicle sends a signal, it activates the electromagnet within the brake assembly. This magnet then creates a force that pulls the brake shoes against the drum, slowing the trailer.
Components of Electric Brakes
Understanding the parts involved can make adjusting the brakes easier:
- Magnet: Activated by electric current to create the necessary force for braking.
- Brake Shoes: Friction material that presses against the drum to slow the trailer.
- Adjuster: A mechanism that allows for the tension of the brake shoes to be altered.
- Backing Plate: Supports all the brake components.
- Drum: The rotating component that the brake shoes press against.
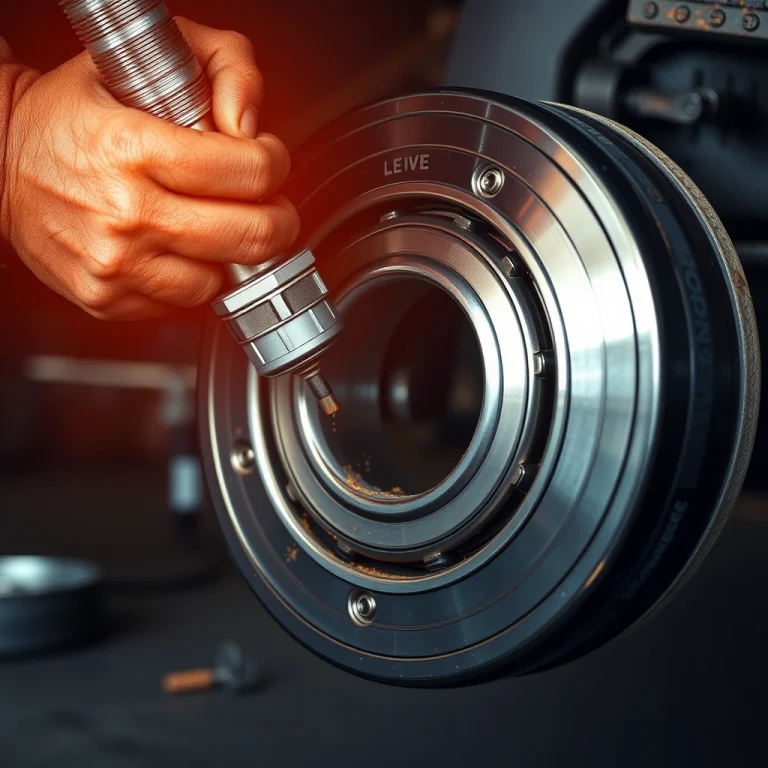
To adjust electric brakes, locate the adjuster on the backing plate. Use a brake spoon or a flathead screwdriver to turn the adjuster, increasing or decreasing the tension. The goal is for the brake shoes to be close enough to the drum for effective braking without causing drag when the brakes are not applied. It’s often helpful to lift the trailer wheel off the ground and spin it to ensure proper adjustment.
Tip: After adjusting, test the brakes in a safe area to confirm proper operation.
Safety Precautions Before Adjustment
Tools Needed
Before adjusting electric brakes on your trailer, gather the necessary tools to ensure a smooth and safe process. Here’s what you’ll need:
- Jack and Jack Stands: To lift and securely hold the trailer.
- Wheel Chocks: To prevent the trailer from moving unexpectedly.
- Lug Wrench: For removing the wheel if needed.
- Screwdriver or Allen Wrench: Depending on the type of adjuster your brakes have.
- Multimeter: To check electrical connections.
- Safety Goggles and Gloves: For personal protection.
Personal Safety Measures
Prioritizing safety is essential when working on your trailer’s electric brakes. Follow these personal safety measures:
- Park on a Level Surface: Ensure the trailer is on a flat, stable surface to prevent rolling.
- Disconnect Power: Unplug the trailer from any power source to avoid electrical hazards.
- Lock the Brakes: Engage the handbrake or parking brake to secure the trailer.
- Proper Attire: Wear close-fitting clothes and avoid loose items that could get caught.
- Use Wheel Chocks: Place chocks on both sides of the tires to prevent movement.
- Work in a Well-Lit Area: Ensure the workspace is bright enough to see clearly.
Tip: Double-check that all tools are in good condition before use to avoid accidents or delays.
Inspecting Brake Components
Checking Brake Pads
Inspecting the brake pads on your trailer is a straightforward process but essential for ensuring safe braking performance. Begin by safely lifting the trailer using a jack and securing it with jack stands. Remove the wheel to access the brake assembly.
Examine the brake pads for wear. The pad thickness should be more than 1/8 inch; if it’s less, replacement is necessary. Look for any signs of cracking, glazing, or contamination with oil or grease, which can reduce efficiency.
Tip: If you frequently tow heavy loads, check the pads more often due to increased wear.
Assessing Brake Drums
After inspecting the pads, turn your attention to the brake drums. Remove the drum carefully, checking for scoring, grooves, or rust on its surface. These imperfections can impair contact with the brake pads, leading to suboptimal braking.
Use a micrometer to measure the drum’s diameter. If it exceeds the maximum diameter specified by the manufacturer, it’s time to replace the drum. A smooth, clean surface is essential for optimal brake function.
Tip: Regular cleaning can prevent rust buildup and extend the drum’s lifespan.
Once you’ve inspected and assessed the condition of both the brake pads and drums, you can be confident in their performance. If any components are worn or damaged, replace them to maintain safety and efficiency.
Adjusting Brake Shoes
Manual Adjustment Methods
To adjust the brake shoes manually, locate the brake adjustment hole on the backing plate of each wheel. You’ll need a brake adjustment tool or a flathead screwdriver. Carefully insert the tool into the adjustment hole and feel for the star wheel, which is connected to the brake shoes.
- Turn the star wheel using the tool. Clockwise rotation will expand the brake shoes toward the drum, increasing friction.
- Adjust until you feel a slight drag when rotating the wheel by hand. This indicates proper contact between the shoes and the drum.
- If the wheel does not rotate freely, slightly back off the star wheel by turning it counterclockwise.
Using Adjustment Tools
For those with access to specific brake adjustment tools, this process can be more precise:
- Secure the trailer on a flat surface, ensuring safety first.
- Use a brake gauge tool to measure the gap between the brake shoes and the drum. This tool helps achieve equal adjustment on all wheels.
- Adjust the star wheel until the gauge shows a consistent gap across all wheels.
Tip: After adjustments, test the brakes at a low speed in a safe area to ensure they engage smoothly and evenly.
Remember, the goal is to achieve consistent and balanced braking performance. Regular checks and adjustments will help maintain safety and performance of your trailer’s braking system.
Testing Brake Adjustment
Road Test Procedures
Once you’ve adjusted the electric brakes on your trailer, it’s essential to test them in a controlled environment to ensure they function correctly. Begin by connecting your trailer to the towing vehicle and heading to a safe, open area like a large parking lot or a quiet road. Gradually increase your speed to about 20 mph and perform a few gentle stops.
Pay attention to how the trailer responds:
- Smooth Stops: The trailer should decelerate smoothly without jerking or locking the wheels.
- Brake Balance: Ensure the trailer brakes are neither overpowering nor underpowered compared to the towing vehicle. It should feel like one seamless unit when stopping.
Fine-Tuning Adjustments
If the initial test shows any issues, make adjustments as needed:
- If the trailer brakes lock up too quickly: Decrease the power on the brake controller slightly and test again.
- If the trailer brakes feel weak: Increase the power on the brake controller incrementally until you achieve a balanced braking experience.
Continue with these adjustments until the trailer stops smoothly in sync with your towing vehicle. Remember to test these changes at various speeds to ensure consistent performance.
Tip: Always refer to the brake controller’s manual for specific adjustment guidelines and safety tips.
Troubleshooting Common Issues
Brake Noise Problems
If you experience unusual noise from the trailer brakes, it often indicates a need for adjustment or maintenance. Here are steps to address this:
- Inspect the Brake Shoes: Remove the wheel and drum to check the brake shoes. If they are worn out, replace them.
- Check for Loose Components: Ensure all bolts and nuts are tightened properly. Vibration can cause noise if components are loose.
- Adjust the Brake Shoes: Use a brake spoon to turn the star wheel adjuster located at the bottom of the brake assembly. Turn until you feel slight resistance when spinning the wheel, then back off slightly.
- Clean the Brake Drum: Dust and debris can cause noise. Clean the drum with brake cleaner.
Uneven Braking
Uneven braking can cause instability when towing. Here’s how to address it:
- Check Brake Adjustment: Unevenly adjusted brakes can cause one side to engage more than the other. Adjust each brake as described in the noise section.
- Inspect the Magnets: Uneven wear on the magnets can lead to inconsistent braking. Check for grooves or uneven surfaces, and replace if needed.
- Examine the Wiring: Ensure all electrical connections are secure and free from corrosion. Faulty wiring can cause uneven power to the brakes.
- Test Brake Controller: Ensure your brake controller is set correctly. Adjust the gain settings for even braking force.
Tip: Regular maintenance checks can prevent most brake issues. Schedule routine inspections to keep your trailer brakes in top condition.
Maintaining Electric Trailer Brakes
Adjusting electric brakes on a trailer is a straightforward task that can boost safety and performance. Properly adjusted brakes ensure your trailer stops smoothly and evenly, reducing wear and tear.
Regular Maintenance Tips
To maintain your trailer’s electric brakes, periodic adjustments are essential. Follow these steps:
- Jack Up the Trailer: Ensure the trailer is secure, then lift it so the wheels are off the ground. This allows you to spin the wheels freely.
- Remove the Wheel: Take off the wheel to access the brake drum.
- Locate the Adjuster: Find the brake adjuster, usually a star wheel, through the backing plate’s access hole.
- Adjust the Brakes: Use a brake spoon or a flathead screwdriver to rotate the star wheel. Turn the adjuster until the wheel feels a slight drag when spinning manually.
- Test the Adjustment: Lower the trailer and perform a road test, applying the brakes at low speed. If the brakes lock up or don’t engage properly, readjust as needed.
When to Seek Professional Help
If adjustments don’t resolve braking issues, or if you notice uneven wear or noise from the brakes, it might be time to consult a professional. They can inspect for hidden problems like damaged wiring or worn-out components that might not be visible during a routine check.
Tip: Regularly inspect the brake controller in your tow vehicle. An incorrectly set brake controller can affect performance even if the brakes are properly adjusted.
Legal and Safety Compliance
Understanding Regulations
When adjusting electric brakes on a trailer, ensuring legal compliance is critical. In the United States, the Department of Transportation (DOT) mandates that trailers with a gross weight of over 3,000 pounds must have brakes on all wheels. This regulation ensures that the trailer can be safely controlled under various road conditions. It is essential to check local and state regulations as they may have additional requirements.
Safety Standards
Safety standards for electric brakes are outlined by organizations such as the National Highway Traffic Safety Administration (NHTSA). These standards require the brakes to be capable of bringing the trailer to a stop within a specified distance. Regularly inspecting your trailer’s brakes for wear and ensuring proper adjustment can help meet these standards.
Steps for Safe Adjustment:
- Inspect Brake Pads: Ensure they are not worn beyond the manufacturer’s specifications.
- Check Wiring: Look for any frayed wires or loose connections that could impede brake functionality.
- Adjust Brake Controller: Follow the manufacturer’s instructions to set the brake controller to the appropriate level for your trailer’s weight.
- Test Brakes: Perform a test drive to ensure brakes are engaging and disengaging smoothly.
Tip: Always consult your trailer’s manual and any local laws before making adjustments to ensure full compliance.
Quick Summary
- Inspect the trailer’s electric brakes regularly to ensure they are functioning properly. This involves checking the brake controllers and wiring connections.
- To adjust the brakes, first, jack up the trailer and secure it safely. Ensure the wheel can rotate freely by releasing the parking brake.
- Locate the brake adjuster, typically found through a small hole at the back of the brake drum. Use a brake spoon or flathead screwdriver to turn the adjuster wheel.
- Adjust the brakes by turning the wheel until you feel a slight drag when spinning the wheel by hand. This indicates proper contact between the brake shoe and drum.
- Perform a test drive to check the brake response. Adjust the brake controller settings in the towing vehicle to achieve a smooth and efficient braking action.
- Regularly maintain and service the brakes to prolong their lifespan, including cleaning and lubricating moving parts as needed.
- Consult the trailer’s manual or a professional if unsure about the adjustment process to ensure safety and correct operation.
Frequently Asked Questions
How do I know if my trailer’s electric brakes need adjustment?
You might notice your trailer taking longer to stop or swaying during braking. Listen for unusual noises or observe any uneven tire wear, which could indicate a need for brake adjustment.
What tools do I need to adjust electric brakes on a trailer?
You’ll need a jack to lift the trailer, a lug wrench to remove the wheels, and a brake adjustment tool or flathead screwdriver to adjust the brake shoes. Having a torque wrench can also help ensure the wheels are properly reinstalled.
How often should I adjust my trailer’s electric brakes?
It’s a good practice to check and adjust your electric brakes every 3,000 miles or annually, whichever comes first. More frequent adjustments might be necessary if you frequently tow heavy loads.
Can I adjust electric brakes on a trailer by myself?
Yes, adjusting electric brakes is a task many DIY enthusiasts can handle with some basic tools and patience. However, if you’re unsure or uncomfortable with the process, consulting a professional is a safe option.
What should I do if the brakes still don’t feel right after adjusting them?
If the brakes don’t perform as expected after adjustment, inspect for worn-out components such as brake shoes or magnets. It may also be necessary to check the trailer’s wiring and the brake controller settings in your tow vehicle.
- Find the Right Engine Oil for Your Car: A Quick Guide - March 1, 2026
- Car Battery Booster Basics: Start Your Vehicle in Minutes - March 1, 2026
- How Long Does It Take To Charge A Motorcycle Battery Charging Time Guide - February 28, 2026