How To Balance A Driveshaft A Diy Guide For Smooth Driving
Balancing a driveshaft might sound daunting, but it’s a task you can tackle with a bit of guidance and patience. Ensuring your driveshaft is balanced can prevent vibrations and extend the life of your vehicle, making for a smoother and more enjoyable ride.
Balancing involves: identifying vibrations, inspecting the driveshaft, and making necessary adjustments with weights. It’s a straightforward process if you follow the steps carefully.

Understanding Driveshaft Imbalance
Causes of Imbalance
Driveshaft imbalance happens when the weight distribution along the shaft is uneven. This can be due to several factors:
- Manufacturing defects: Even a small error during the manufacturing process can cause imbalance.
- Wear and tear: Over time, components like U-joints and splines can wear out, leading to imbalance.
- Damage: Physical damage from debris or accidents can alter the shaft’s balance.
- Improper installation: Incorrect installation of the driveshaft or its components can result in uneven weight distribution.
Symptoms of an Unbalanced Driveshaft
Identifying an unbalanced driveshaft is crucial for maintaining vehicle performance. Look for these symptoms:
- Vibrations: Unusual vibrations while driving, especially at higher speeds, are a common indicator.
- Noises: Listen for clunking or rattling sounds coming from beneath the vehicle.
- Uneven wear: Check for uneven tire wear, as imbalance can affect wheel alignment.
- Increased fuel consumption: An unbalanced driveshaft can cause the engine to work harder, reducing fuel efficiency.

Tip: Regularly inspect your driveshaft for signs of wear or damage. Early detection can prevent more serious issues.
Tools and Equipment Needed
Essential Tools
Balancing a driveshaft requires some fundamental tools to ensure precision and safety:
- Jack Stands: To safely lift and support the vehicle while you work on the driveshaft.
- Socket Set: Necessary for removing and re-installing bolts and nuts.
- Dial Indicator: Measures the runout of the driveshaft, helping identify imbalance.
- Tire Chalk or Marker: Marks the driveshaft for alignment purposes.
- Torque Wrench: Ensures bolts are fastened to the correct specifications.
Optional Tools
While not strictly necessary, these tools can make the process more efficient:
- Laser Alignment Tool: Provides a precise method to check alignment, reducing guesswork.
- Electronic Balancer: Offers a digital readout for a more accurate balancing process, suitable for those who frequently work with driveshafts.
- Impact Wrench: Speeds up the removal and installation of bolts, especially useful if you’re working alone.
- Safety Glasses and Gloves: Protects you from dust and debris during the process.
- Lubricant Spray: Eases the removal of rusty or stuck bolts.
Tip: Always double-check the vehicle’s manual for specific torques and procedures, ensuring a safe and effective balancing process.
Preparing the Vehicle
Safety Precautions
Before starting any work on your vehicle, ensuring safety is paramount. Begin by parking your vehicle on a flat, stable surface. Engage the parking brake and switch the vehicle off to prevent any accidental movements.
Wear appropriate safety gear such as gloves and safety glasses to protect yourself from potential hazards. Keep a fire extinguisher nearby as a precautionary measure.
Elevating the Vehicle
To access the driveshaft, you need to elevate the vehicle safely. Follow these steps:
- Use Jack Stands: Position a hydraulic jack under the vehicle’s designated jacking points, usually found in the owner’s manual. Lift the vehicle until you have enough clearance to work comfortably underneath.
- Secure with Stands: Place jack stands under the jacking points. Ensure they are positioned securely before lowering the vehicle onto them. Never rely solely on a hydraulic jack, as it can fail unexpectedly.
- Wheel Chocks: Place wheel chocks behind and in front of the tires on the opposite end of where you are working to prevent any rolling.
Tip: Double-check the stability of the vehicle after it is elevated. If it wobbles or shifts, readjust the jack stands.
Once the vehicle is safely elevated, you are now ready to begin the driveshaft removal process.

Removing the Driveshaft
Step-by-Step Removal Process
Removing the driveshaft requires careful attention and the right tools. Follow these steps to ensure a smooth process:
- Prepare the Vehicle: Park the vehicle on a flat surface and engage the parking brake. Use wheel chocks to secure the wheels.
- Lift the Vehicle: Use a jack to lift the vehicle and place jack stands under the frame for safety. Ensure the vehicle is stable before proceeding.
- Locate the Driveshaft: Identify the driveshaft under the vehicle. It connects the transmission to the differential.
- Mark the Driveshaft: Use chalk or a marker to mark the alignment of the driveshaft with the transmission and differential. This ensures proper reinstallation.
- Remove Bolts: Use a wrench to remove the bolts securing the driveshaft to the differential and transmission. Keep the bolts in a safe place for reinstallation.
- Detach the Driveshaft: Carefully slide the driveshaft out from the transmission and differential. Support the driveshaft to prevent it from dropping.
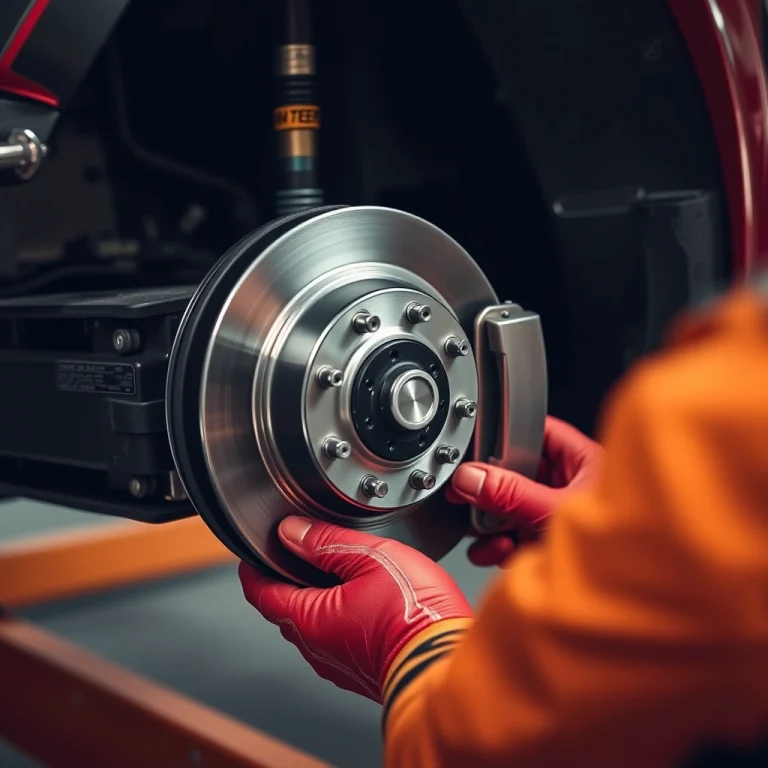
- Inspect: Check the driveshaft for any visible damage or wear. This is an opportune time to replace worn U-joints if necessary.
Tip: Always wear safety goggles and gloves during the removal process to protect against debris and injuries.
With the driveshaft removed, you can proceed with balancing or any necessary repairs. Ensure all components are clean and in good condition before reinstalling.
Inspecting the Driveshaft
Visual Inspection
Start by checking the driveshaft for any physical damage. Look for dents, cracks, or bends along the shaft. These can cause imbalance and lead to vibrations. Ensure that the universal joints and splines are intact and free from excessive wear or rust.
Pay attention to the balance weights. These small metal pieces are usually welded to the shaft. If any are missing or loose, the driveshaft may become unbalanced.
Measuring Runout
Runout refers to the wobble or deviation from the true rotation of the driveshaft. Excessive runout can cause vibration and wear on the drivetrain components.
- Tools needed: Dial indicator, magnetic base.
- Steps:
- Secure the dial indicator to a suitable part of the vehicle so that the probe touches the driveshaft’s surface.
- Rotate the driveshaft manually and observe the dial indicator.
- Record the readings at various points along the shaft. Typically, runout should not exceed 0.010 inches (0.25 mm).
If the runout is greater than the acceptable limit, the shaft may need straightening or might require replacement.
Tip: Always perform these inspections with the vehicle safely lifted and secured to prevent accidents.
Balancing the Driveshaft
Static Balancing
Static balancing focuses on ensuring the driveshaft remains stationary and balanced around its axis without any rotation. This method is often used for simpler balancing tasks.
- Chalk Method: Support the driveshaft horizontally on two knife edges. Gently rotate the shaft. Mark the point where it consistently stops at the bottom with chalk, indicating the heaviest spot.
- Weight Adjustment: Add small weights (like washers) opposite the chalk mark, using tape or a clamp. Repeat the rotation and adjust until the shaft no longer stops consistently at one point.
Tip: Always start with small weights to avoid overcompensation, and adjust incrementally.
Dynamic Balancing
Dynamic balancing is more complex and involves balancing the driveshaft while it is rotating. This method is more precise and typically requires machinery.
- Balancing Machine: A specialized machine spins the driveshaft at high speeds. Sensors detect imbalances and calculate the exact weight and position needed to achieve balance.
- Weight Placement: Based on the machine’s feedback, weights are welded or attached to the driveshaft at specific angles and positions.
This process requires professional equipment and is best done by specialists, especially for high-speed applications.
Tip: For optimal results, consider professional dynamic balancing if the driveshaft will be used in high-performance or high-speed vehicles.
Reinstalling the Driveshaft
Reinstalling a driveshaft requires precision to maintain vehicle stability and performance. Follow these steps to ensure proper alignment and secure installation.
Alignment Tips
Before reinstalling, inspect the driveshaft and related components for any visible damage. Ensure that the universal joints are in good condition and properly aligned.
| Item Checked | Action Required | Purpose |
|---|---|---|
| Driveshaft | Inspect for visible damage | Prevent vibration or failure |
| Universal Joints | Check condition and alignment | Ensure smooth power transfer |
| Alignment Marks | Reinstall in original position | Maintain balance |
| Center Support Bearing | Align correctly (if equipped) | Reduce vibration |
| Driveshaft Angles | Verify within manufacturer specs | Prevent premature wear |
- Mark Alignment: If you removed the driveshaft for maintenance, ensure it is reinstalled in the same position. Marking the driveshaft and flange before removal can help with this.
- Center Support Bearing: If your vehicle has a center support bearing, make sure it is aligned correctly to avoid vibrations.
- Angle Check: Ensure that the angles of the driveshaft are within manufacturer specifications to prevent premature wear.
Torque Specifications
Proper torque is critical for securing the driveshaft and preventing any movement during operation. Use a torque wrench to tighten bolts according to the vehicle’s specifications:
- Refer to your vehicle’s service manual for the exact torque values. Common values range between 80-120 Nm, but this can vary.
- Start by tightening the bolts in a crisscross pattern to ensure even pressure distribution.
- Double-check all bolts after the initial tightening to confirm they meet the specified torque.
Tip: After installation, take the vehicle for a short drive to listen for unusual noises or vibrations, indicating potential alignment issues.
Testing and Final Adjustments
Test Drive
After balancing your driveshaft, a test drive helps confirm that the issue is resolved. Take your vehicle to a smooth and open road. Gradually increase speed, listening and feeling for vibrations. If the driveshaft is balanced properly, vibrations should be minimal or non-existent.
During the test, pay attention to any unusual noises or handling issues, as these can be signs of other underlying problems. Stop the vehicle and inspect the driveshaft if you notice anything concerning.
Adjusting for Residual Imbalance
If you experience persistent vibrations during your test drive, further adjustments may be necessary.
- Check for loose components: Ensure that all bolts and fasteners are tightened properly. Loose parts can mimic imbalance.
- Re-evaluate balance: Use a balance weight if needed. Sometimes, small weight changes can make a significant difference.
- Inspect for damage: Look for dents, bends, or other physical damage on the driveshaft. These can cause imbalance and might require professional repair.
Tip: A slight vibration might not be from the driveshaft. Check other components like tires and suspension if issues persist.
Repeat the test drive after making adjustments. It might take a few tries to get the balance just right, but patience pays off. Once the driveshaft is properly balanced, your vehicle should run smoothly without unwanted vibrations.
Quick Summary
- Ensure the vehicle is safely lifted and supported before starting the driveshaft balancing process.
- Inspect the driveshaft for visible signs of damage or wear, such as dents or bends.
- Use a chalk or paint marker to create a reference line along the driveshaft to monitor any movements during the balancing process.
- Gradually adjust the weight distribution by adding small balancing weights, starting near the center and moving outward, checking balance after each adjustment.
- Test the driveshaft by slowly rotating it and checking for vibrations, using a vibration meter if available.
- Securely fasten all components and remove any temporary markings once the driveshaft is balanced.
Frequently Asked Questions
What is the purpose of balancing a driveshaft?
Balancing a driveshaft is essential to ensure smooth operation and prevent vibrations. Unbalanced driveshafts can lead to premature wear of vehicle components and uncomfortable driving experiences.
How can I tell if my driveshaft is out of balance?
Common signs of an unbalanced driveshaft include vibrations felt in the floorboard or seats, unusual noises, and visible wear on the universal joints. If you experience these symptoms, a balance check may be needed.
What tools do I need to balance a driveshaft?
You will need a jack and jack stands to safely elevate the vehicle, a wrench set for removing the driveshaft, and a balancing machine or weights to adjust the balance. Safety equipment such as gloves and eye protection is also recommended.
Can I balance a driveshaft at home without professional help?
While it is possible to balance a driveshaft at home, it requires precision and the right equipment. If you are unfamiliar with the process or lack the necessary tools, consulting a professional is advisable to avoid potential damage.
How often should a driveshaft be balanced?
A driveshaft typically only needs rebalancing if you notice symptoms of imbalance or after it has been repaired or modified. Regular maintenance checks can help you catch issues early.
- Find the Right Engine Oil for Your Car: A Quick Guide - March 1, 2026
- Car Battery Booster Basics: Start Your Vehicle in Minutes - March 1, 2026
- How Long Does It Take To Charge A Motorcycle Battery Charging Time Guide - February 28, 2026