How To Change Bearings On A Trailer Step-by-step Guide For Diyers
Changing trailer bearings might seem intimidating at first, but with the right guidance, it becomes a manageable task. Whether you’re prepping for a long trip or conducting routine maintenance, understanding how to replace these components can save time and money.
Start by gathering tools, removing the wheel, and inspecting the bearings. Clean and replace as needed to ensure a smooth and safe journey.
Introduction to Trailer Bearings
What are Trailer Bearings?
Trailer bearings are a vital component of your trailer’s wheel assembly. They allow the wheels to rotate smoothly by reducing friction between the wheel hub and the axle. This is crucial for ensuring your trailer moves efficiently and safely, whether you’re hauling a boat, a camper, or equipment.
Importance of Regular Maintenance
Regular maintenance of trailer bearings is essential to prevent breakdowns and extend the lifespan of your trailer. Over time, bearings can wear out due to heat and pressure, leading to potential failure. A well-maintained bearing reduces the risk of seizing, which can cause wheel detachment, leading to severe damage or accidents.
Ignoring the maintenance of trailer bearings can result in costly repairs and pose safety hazards. Regular inspection and replacement of bearings ensure that your trailer remains in good condition and operational for longer periods.
Tip: It’s a good practice to check your trailer bearings every 12 months or 12,000 miles, whichever comes first.
Tools and Materials Needed
Essential Tools
To change bearings on a trailer, having the right tools is key to ensuring the process is smooth and efficient. Here’s what you’ll need:
- Socket Set: A complete set will help you remove the hub nut and other bolts securely.
- Torque Wrench: This is essential for tightening bolts to the correct specifications to prevent over-tightening or loosening.
- Needle Nose Pliers: Useful for removing cotter pins from the axle nut.
- Hammer and Chisel: These are used to gently tap out the old bearings and races from the hub.
- Jack and Jack Stands: To safely lift and support the trailer during the bearing replacement.
Recommended Supplies
In addition to tools, certain supplies are recommended to complete the job effectively:
- Wheel Bearing Grease: High-temperature grease is necessary for lubricating the new bearings.
- New Bearings and Races: Ensure they match the specifications of your trailer’s hub.
- Grease Seals: These help prevent dirt and moisture from entering the hub, prolonging the life of the bearings.
- Cotter Pins: Always replace the old pins with new ones to secure the axle nut.
- Shop Towels: Handy for cleaning parts and wiping excess grease.
Tip: Before starting, lay out all your tools and supplies to ensure nothing is missing. This saves time and prevents interruptions during the replacement process.
Preparing the Trailer
Safety Precautions
Before you begin replacing the bearings on your trailer, ensure your safety and that of others around you. Here’s a quick checklist to follow:
- Wear protective gear: Use gloves to protect your hands and safety goggles to shield your eyes from dust and debris.
- Use wheel chocks: Secure the trailer by placing wheel chocks on the side opposite to where you will be working. This prevents any unintended movement.
- Check your tools: Ensure all the tools you plan to use are in good condition. This includes a jack, jack stands, and socket wrenches.
Positioning the Trailer
Proper positioning of the trailer is essential to facilitate easy access to the bearings and to maintain safety throughout the process.
- Find a level surface: Park the trailer on a flat, stable area. This ensures balance when lifting it with a jack.
- Engage the parking brake: This additional measure helps stabilize the trailer.
- Elevate the trailer: Use a jack to lift the trailer high enough to remove the wheel. Place jack stands under the axle to support the trailer securely. Never rely solely on the jack to hold the trailer’s weight.
Tip: Double-check the stability of the trailer once it’s on the jack stands. A gentle push will help ensure that the setup is solid and won’t tip over during your work.
Removing Old Bearings
Removing the Wheel
Begin by parking the trailer on a level surface and ensuring it is securely chocked. Use a jack to raise the wheel off the ground. Once elevated, remove the lug nuts with a wrench and carefully slide the wheel off the axle.

Extracting the Bearings
With the wheel removed, you will expose the hub. First, pry off the dust cap using a flathead screwdriver. This will reveal the spindle nut, which is typically secured by a cotter pin. Straighten the cotter pin using pliers and pull it out.
Next, use a wrench to unscrew the spindle nut. After removing the nut, carefully slide the hub off the axle. You may need to give it a gentle tug if it feels stuck.
As the hub comes off, make sure to catch the bearings and washers that may fall out. The outer bearing should come out easily, while the inner bearing will be slightly more challenging due to grease and the seal holding it in place.
Tip: Keeping a container nearby to hold all removed parts can help avoid losing small components.
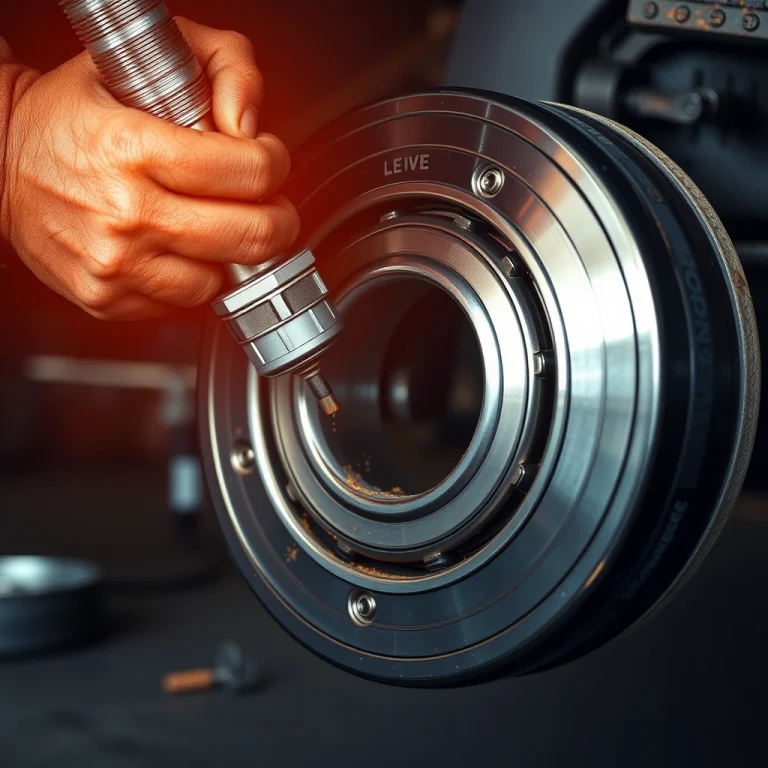
To remove the inner bearing, pry out the grease seal using a seal puller or a flathead screwdriver. Once the seal is out, the inner bearing should come out easily.
At this point, all old bearings and seals should be out, and you can proceed to clean the hub and prepare it for new bearings.
Inspecting and Cleaning Components
Inspecting for Damage
Before installing new bearings, it’s essential to examine the existing components for wear or damage. Begin by inspecting the hub, spindle, and old bearings closely. Look for signs of pitting, scoring, or any irregularities on the spindle surface. Check the hub for cracks or excessive wear, which might compromise the new bearings’ fit.
- Spindle: Ensure it’s smooth and free of grooves or scratches.
- Hub: Look for any deformation or cracks.
- Old Bearings: Observe for metal shavings or discoloration.
If any damage is found, consider replacing the affected parts to maintain the trailer’s safety and performance.
Cleaning the Hub and Spindle
Cleaning these components is a straightforward process but must be done thoroughly. Start by removing any old grease and debris from the hub and spindle using a rag or paper towels. For stubborn grime, use a degreaser or brake cleaner. Be sure to dry all parts completely before proceeding to the next step.
- Rags or Paper Towels: Use these to wipe away grease.
- Degreaser or Brake Cleaner: Helps remove stubborn residue.
- Drying: Ensure all parts are moisture-free.
Tip: Cleaning the hub and spindle not only helps in a smooth installation of new bearings but also reduces the risk of contamination.
Installing New Bearings
Greasing the Bearings
To ensure smooth operation and prevent premature wear, it is essential to properly grease the new bearings before installation. Use a high-quality bearing grease suitable for trailers. Below is a simple process to grease the bearings:
- Clean Hands: Make sure your hands are clean to avoid contaminating the grease.
- Apply Grease: Scoop a generous amount of grease into one hand. With the other hand, hold the bearing and press it into the grease, ensuring it penetrates the bearing completely. Rotate the bearing to cover all surfaces.
- Check Coverage: Ensure that the grease is fully packed into the bearing, filling all gaps between the rollers.
Inserting New Bearings
Once the bearings are greased, follow these steps to install them correctly:
- Position Bearings: Place the inner bearing into the hub, followed by the inner grease seal. Carefully tap the seal into place using a rubber mallet.
- Mount the Hub: Slide the hub onto the axle spindle, ensuring it fits snugly.
- Install Outer Bearing: Insert the outer bearing into the hub, followed by the washer and spindle nut. Tighten the nut until it is secure but not overly tight.
- Secure Nut: Once the nut is set, install a new cotter pin through the hole in the spindle and bend the ends to secure it.
- Final Check: Spin the wheel to confirm smooth rotation and adjust the nut if necessary to ensure proper tension.
Tip: Always use new seals and cotter pins to ensure a secure fit and prevent future issues.
Testing the Installation
Checking for Proper Fit
After replacing the bearings on your trailer, ensuring a proper fit is essential for safe and smooth operation. Begin by manually rotating each wheel. They should turn smoothly without any wobble or grinding noise. If you notice any irregularities, recheck the installation of the bearings and the condition of the axle.
Next, inspect the hub assembly. The hub should sit snugly against the axle, without any noticeable gaps. Gently shake each wheel side-to-side and up-and-down to check for play. Any movement could indicate that the bearings are not seated correctly or that the axle nut is not properly tightened.
Test Drive Procedures
Once you are satisfied with the initial checks, proceed with a test drive. Attach the trailer to your vehicle and start with a short, slow drive around your area. Pay attention to any unusual sounds or vibrations coming from the wheels. A quiet and smooth ride typically indicates a successful installation.
After driving a few miles, stop and perform a temperature check. Carefully touch the hub areas to feel for excessive heat. Warm is normal – hot is not. Overheating may suggest that the bearings are too tight or improperly lubricated, requiring immediate attention.
Tip: Always carry a spare set of bearings and tools during your first few trips after replacement. This prepares you for any unforeseen issues.
Finally, once you have completed a few test drives without any issues, your trailer is ready for regular use. Regularly inspect your bearings to maintain their condition and ensure continued safe operation.
🛠 Trailer Bearing Maintenance Schedule
| Maintenance Task | Recommended Interval |
|---|---|
| Inspect Bearings | Every 12 months |
| Repack with Grease | Every 12,000 miles |
| Replace Bearings | If worn or damaged |
| Check Hub Temperature | After long trips |
Maintenance Tips
Regular Inspection Schedule
Maintaining trailer bearings is essential for safety and longevity. Regular inspections can prevent unexpected breakdowns and costly repairs. Aim to inspect your trailer bearings at least once a year, or every 10,000 miles, whichever comes first. For those who frequently tow heavy loads or travel through harsh conditions, more frequent checks might be necessary.
Signs of Wear
Recognizing the signs of bearing wear early can save you from bigger issues down the road. Here are some warning signs to watch out for:
- Noise: Unusual grinding or squealing noises while the trailer is in motion.
- Heat: Bearings that are hotter than usual after a short drive.
- Vibration: Excessive vibration or wobbling of the wheel.
- Visual Damage: Cracks, rust, or discoloration on the bearings.
Tip: Always clean and repack the bearings with fresh grease during each inspection.
Stay proactive with these maintenance tips to ensure your trailer stays in top shape. Regular inspections and understanding the signs of wear will help you change bearings timely and keep your rides smooth and safe.
Quick Summary
- Ensure safety first by securing the trailer on a level surface using wheel chocks and a jack stand for stability.
- Remove the wheel by loosening the lug nuts with a wrench and carefully taking the wheel off the hub.
- Disassemble the hub by removing the dust cap, cotter pin, and castle nut. Take off the hub to access the bearings.
- Inspect both the inner and outer bearings for wear or damage, replacing them if necessary. Clean the hub thoroughly before installing new bearings.
- Pack the new bearings with grease, ensuring they are fully lubricated, and reassemble the hub by reversing the disassembly process.
- Tighten the castle nut until snug, then back off slightly to allow for free rotation of the hub. Secure with a new cotter pin and replace the dust cap.
- Reattach the wheel, tightening the lug nuts in a crisscross pattern to ensure even pressure, and lower the trailer back to the ground.
Trailer Bearing Replacement Checklist
| Category | Item | Purpose |
|---|---|---|
| Lifting Equipment | Jack & Jack Stands | Safely lift and support trailer |
| Hand Tools | Socket Set | Remove lug nuts & spindle nut |
| Hand Tools | Needle Nose Pliers | Remove cotter pin |
| Removal Tools | Hammer & Chisel | Remove races and seals |
| Supplies | High-Temp Bearing Grease | Lubricate new bearings |
| Replacement Parts | New Bearings & Races | Ensure smooth wheel rotation |
| Replacement Parts | Grease Seals | Protect from dirt & moisture |
| Safety | Gloves & Safety Glasses | Personal protection |
Frequently Asked Questions
What tools do I need to change the bearings on a trailer?
You’ll need a socket wrench, a hammer, pliers, a jack, a wheel chock, and bearing grease. It’s also helpful to have a torque wrench to ensure the bearings are tightened to the correct specification.
How do I know when it’s time to change my trailer bearings?
Listen for unusual noises like grinding or squealing coming from the wheels. Also, if you feel excessive heat around the hub after a trip, it may indicate worn bearings needing replacement.
Can I reuse the old bearing grease when changing trailer bearings?
It’s best to use new bearing grease when replacing trailer bearings. Old grease can become contaminated with dirt and metal particles, which can lead to premature bearing failure.
How often should trailer bearings be replaced?
Typically, trailer bearings should be inspected and repacked with grease every 12 months or 12,000 miles, whichever comes first. Replace them if there is any sign of wear or damage.
Is it necessary to replace both bearings in a set if only one is damaged?
It is recommended to replace both bearings on the same axle at the same time. This ensures even wear and helps prevent future issues, as the other bearing could be close to failure as well.
- Find the Right Engine Oil for Your Car: A Quick Guide - March 1, 2026
- Car Battery Booster Basics: Start Your Vehicle in Minutes - March 1, 2026
- How Long Does It Take To Charge A Motorcycle Battery Charging Time Guide - February 28, 2026