How To Change Transmission Fluid And Filter Diy Transmission Guide
Changing your transmission fluid and filter can feel like a daunting task, yet it’s a rewarding DIY project that keeps your vehicle running smoothly. With a bit of patience and attention to detail, you can tackle this essential maintenance job confidently.
Start by gathering the right tools, locate the transmission pan, and drain the old fluid carefully. Replace the filter and gasket before adding new fluid. This straightforward process can extend your transmission’s lifespan and improve performance.
Understanding Your Vehicle’s Transmission System
Types of Transmission
Understanding the type of transmission in your vehicle is the first step to maintaining it properly. There are two main types:
- Automatic Transmission: Uses a torque converter and gears to change speeds automatically. It requires specific automatic transmission fluid (ATF) for lubrication and cooling.
- Manual Transmission: Relies on a clutch and gear stick. Manual transmission fluid is often thicker and may be referred to as gear oil.
Signs of Transmission Fluid Issues
Recognizing when your transmission needs attention can save you from costly repairs. Here are common indicators that a fluid change might be necessary:
- Slipping Gears: If the transmission slips between gears, it might be due to low or degraded fluid.
- Unusual Noises: Grinding or whining sounds when shifting can indicate contaminated fluid.
- Delayed Shifting: A delay when changing gears could be a sign of fluid issues.
- Fluid Leaks: Spotting red or brown fluid under your car is a clear sign of a leak.
- Burnt Smell: Overheated fluid will produce a burnt odor, suggesting immediate action is required.
Tip: Regularly check your transmission fluid by using the dipstick under the hood, if your vehicle is equipped with one. The fluid should be clear and reddish; any other color or particles indicate it’s time for a change.
Tools and Materials Needed
Essential Tools
To successfully change your transmission fluid and filter, you will need a few specific tools to make the process smooth and efficient:
- Socket set – Crucial for removing the transmission pan bolts.
- Wrench set – For handling various nuts and bolts during the procedure.
- Drain pan – To catch the old transmission fluid as it drains out.
- Jack and jack stands – To safely elevate your vehicle.
- Screwdriver – Useful for prying off the old filter and handling clamps.
- Funnel – Assists in pouring new fluid into the transmission without spills.
Recommended Supplies
In addition to tools, having the right supplies at hand is key:
- New transmission fluid – Check your vehicle’s manual for the correct type and quantity.
- Replacement transmission filter – Ensure it matches your vehicle’s make and model.
- Gasket or sealant – A new gasket or appropriate sealant for the transmission pan to prevent leaks.
- Rags or paper towels – For cleaning up spills and wiping down components.
- Gloves – To protect your hands from the fluid and dirt.
With these tools and supplies ready, you’ll be well-prepared to tackle changing your transmission fluid and filter efficiently.
Preparing the Vehicle
Safety Precautions
Before you start, ensure your safety by wearing protective gear. Use gloves to prevent skin contact with transmission fluid, which may cause irritation. Safety glasses are advisable to protect your eyes from any splashes. Make sure the vehicle is on a flat surface to avoid any accidental movement.
Vehicle Setup
To begin, gather the necessary tools and materials: a drain pan, wrenches, a new transmission filter, and the correct type and amount of transmission fluid for your vehicle. Refer to your vehicle’s manual for specifications.
- Park the vehicle on a level surface and engage the parking brake.
- Lift the vehicle using a jack and secure it with jack stands. Never rely solely on a jack to support the vehicle.
- Allow the engine to cool down if it has been running, as hot fluids can cause burns.
Once the vehicle is secure and cool, locate the transmission pan beneath the vehicle. Place the drain pan underneath to catch the old fluid. Double-check that you have everything ready before proceeding to avoid unnecessary interruptions during the process.
Tip: Label the bolts you remove from the transmission pan, as they may vary in length. This will help ensure they are replaced correctly.
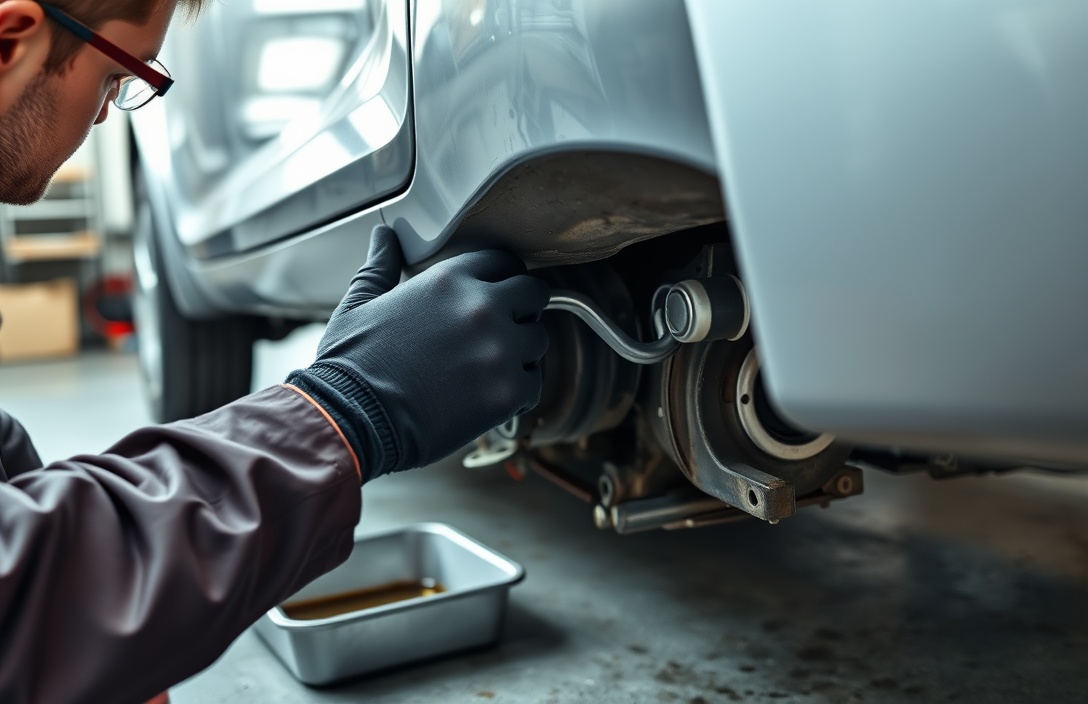
Draining Old Transmission Fluid
Locating the Drain Plug
The first step in draining old transmission fluid is to locate the drain plug. Generally, this plug is found on the bottom or side of the transmission pan. Make sure your vehicle is on a flat, stable surface, and use a jack and jack stands if necessary to gain better access. Always prioritize safety – ensure the car is securely lifted and cannot roll.
Proper Drainage Techniques
Once the drain plug is located, position a large drain pan underneath to catch the old fluid. Wearing gloves, use a socket wrench to loosen the drain plug. Turn it slowly, as fluid may begin to drain immediately. Allow the fluid to drain completely into the pan. This might take a few minutes, so be patient and let gravity do the work.
Pro Tip: “Clean the drain plug with a cloth once removed. This helps prevent any debris from getting back into the transmission when you replace it.”
After the fluid is fully drained, inspect the fluid for any metal shavings or unusual particles. This can be an indication of internal wear. If you notice anything concerning, consult with a professional mechanic.
Once the old fluid has been drained, use a clean rag to wipe around the plug area. Carefully reinstall the drain plug, ensuring it is tight but not overtightened, as this could strip the threads or damage the plug.
With the old fluid properly drained and the plug securely back in place, you are now ready to move on to the next step – replacing the transmission filter and adding new fluid.
Replacing the Transmission Filter
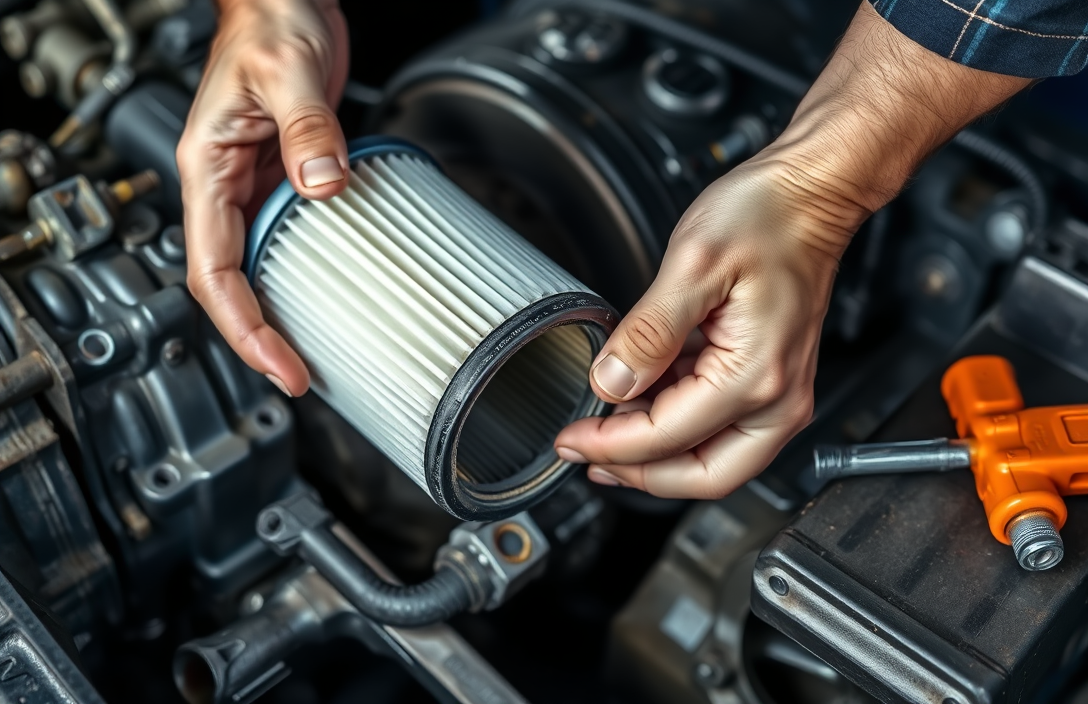
Removing the Old Filter
Once the transmission pan is off, you’ll see the old filter. It’s typically held in place by screws or clips. Carefully remove these fasteners using the appropriate screwdriver or socket wrench. Be gentle here-transmission components are often delicate.
- Tip: Keep track of all screws and clips. A small container can help prevent any losses.
After removing the fasteners, gently pull the filter down. Some transmission fluid may still drip, so ensure your drain pan is strategically placed to catch any remaining fluid. Dispose of the old filter according to local regulations.
Installing the New Filter
Before installing the new filter, compare it with the old one to ensure they match in size and shape. This ensures you have the correct replacement.
- Check the rubber gasket: Some filters come with a new gasket. Make sure this is in place on the new filter.
- Align the filter: Position the new filter in the same orientation as the old one. Insert it carefully into place.
- Secure the filter: Reattach the screws or clips to hold the filter firmly. Don’t overtighten-just snug enough to keep it secure.
“Double-check that everything is aligned correctly before proceeding to install the transmission pan.”
With the new filter installed, you’re ready to move on to reinstalling the transmission pan and adding fresh fluid. These steps will help ensure your transmission runs smoothly and efficiently.
Refilling with New Transmission Fluid
Choosing the Right Fluid
Selecting the correct transmission fluid is essential for the longevity and performance of your vehicle. Start by consulting your vehicle’s owner manual to find the recommended fluid type. Different vehicles require different fluids, and using the wrong type can lead to significant issues.
Consider these tips when choosing your fluid:
- Type: The type of transmission fluid varies based on the make and model of the vehicle. Common types include ATF (Automatic Transmission Fluid) and CVT (Continuously Variable Transmission) fluid.
- Brand: Stick with reputable brands that meet the specifications listed in your manual. This ensures compatibility and performance.
- Viscosity: Check the viscosity rating to ensure the fluid will perform well under various temperature conditions.
Refilling Process
Once you’ve chosen the right fluid, the refilling process is straightforward. Follow these steps:
- Prepare the Vehicle: Ensure the vehicle is on a level surface and secured with the parking brake.
- Locate the Dipstick or Fill Plug: Depending on your vehicle, you may need to fill through a dipstick tube or a fill plug on the transmission itself.
- Use a Funnel: Place a funnel in the dipstick tube or fill hole to avoid spills.
- Pour the Fluid: Slowly add the new transmission fluid, checking the level with the dipstick periodically to prevent overfilling.
- Check for Leaks: After refilling, start the engine and let it run for a few minutes. Then, check beneath the vehicle for any signs of leaks.
Tip: Always double-check the fluid level after driving the vehicle for a short distance, as the fluid may settle and require a slight top-up.
Checking for Leaks and Final Adjustments
Inspecting for Leaks
Once you’ve changed the transmission fluid and filter, it’s time to check for any leaks. Start the engine and let it idle for a few minutes. This allows the new fluid to circulate through the system. Then, carefully inspect the area around the transmission pan and the drain plug. Look for any signs of leaking fluid, which might appear as fresh, wet spots or drips.
Pay close attention to the gasket around the transmission pan. If you spot any leaks, ensure that the bolts are tightened evenly and securely. Avoid over-tightening, as this can damage the gasket and create further issues.
Adjusting Fluid Levels
After ensuring there are no leaks, you need to check the transmission fluid level. With the engine still running, shift through all the gears to help the fluid distribute evenly. Then, place the vehicle in park or neutral and pull out the transmission dipstick.
Wipe the dipstick clean, reinsert it fully, and then pull it out again to check the fluid level. The fluid should be between the ‘Full’ and ‘Add’ marks. If it’s low, add small amounts of the recommended transmission fluid, checking the level each time you add more to avoid overfilling.
Tip: Always use the type of transmission fluid specified in your vehicle’s manual to ensure optimal performance and avoid potential damage.
Once the fluid is at the correct level, take the car for a short drive, then recheck the fluid level and for any new leaks. This ensures everything is in perfect working order and ready for normal operation.
Maintenance Tips for Longevity
Regular Inspection
Regular inspections are the foundation of maintaining a healthy transmission system. Periodically check for fluid leaks under your vehicle. If you notice any red or brown spots, investigate immediately to prevent further damage. A visual inspection of the transmission fluid can tell you a lot – it should be a bright red color and have a sweet smell. If it’s dark or has a burnt odor, it’s time for a change.
Fluid Change Intervals
Changing your transmission fluid and filter at recommended intervals is essential for longevity. Most manufacturers suggest changing the fluid every 30,000 to 60,000 miles, but always refer to your vehicle’s manual for precise guidance. If you drive in harsh conditions, such as heavy traffic or mountainous terrain, consider shorter intervals.
Tip: Always use the type of transmission fluid specified by your vehicle manufacturer. Different transmissions require different fluids, and using the wrong one can cause damage.
When changing the fluid, follow these basic steps:
- Secure the vehicle on a level surface and allow the engine to cool.
- Drain the old transmission fluid by removing the transmission pan. Be prepared for the fluid to pour out quickly.
- Replace the transmission filter, ensuring it is properly aligned and secured.
- Clean the transmission pan and install a new gasket to prevent leaks.
- Reattach the pan securely and refill with new transmission fluid using a funnel through the dipstick tube.
- Check the fluid level with the engine running and add more if necessary.
By adhering to these maintenance tips, you can extend the life of your transmission system and ensure smooth vehicle operation.
Quick Summary
- Gather necessary tools and materials: You’ll need a jack and jack stands, a drain pan, a socket set, a new transmission filter, transmission fluid, and a funnel.
- Elevate the vehicle: Safely jack up your car and secure it with jack stands to ensure stability while you work underneath.
- Drain the old transmission fluid: Locate the transmission pan, place a drain pan beneath it, and remove the drain plug to let the old fluid out.
- Remove the transmission pan: After draining, unbolt the transmission pan carefully to access the old filter. Be prepared for some residual fluid to spill out.
- Replace the filter: Remove the old transmission filter and replace it with a new one. Ensure it’s seated properly to avoid leaks.
- Reattach the transmission pan: Clean the pan and the gasket surface thoroughly, then bolt the pan back onto the transmission.
- Refill with new transmission fluid: Using a funnel, pour the correct type and amount of transmission fluid into the transmission through the dipstick tube, then check the level to ensure it’s filled correctly.
Frequently Asked Questions
How often should I change my transmission fluid and filter?
Generally, it’s recommended to change the transmission fluid and filter every 30,000 to 60,000 miles. However, always check your owner’s manual for your vehicle’s specific requirements.
What tools do I need to change transmission fluid and filter?
You’ll need a socket set, a wrench, a drain pan, a new filter, and the correct type of transmission fluid for your vehicle. It’s also helpful to have a funnel and some clean rags.
Can I change my transmission fluid and filter myself?
Yes, if you’re comfortable with basic car maintenance tasks. Ensure you have the right tools, follow your vehicle’s service manual, and take safety precautions while working under the car.
What are the signs that my transmission fluid needs changing?
Common signs include rough shifting, unusual noises, or a delay in movement after shifting gears. If your fluid is dark or has a burnt smell, it’s time for a change.
What happens if I don’t change my transmission fluid and filter?
Neglecting to change the fluid and filter can lead to transmission wear and damage. This may result in costly repairs or even the need for a complete transmission replacement.
- Find the Right Engine Oil for Your Car: A Quick Guide - March 1, 2026
- Car Battery Booster Basics: Start Your Vehicle in Minutes - March 1, 2026
- How Long Does It Take To Charge A Motorcycle Battery Charging Time Guide - February 28, 2026