How To Check Brake Pad A Step-by-step Guide For Beginners
Understanding the condition of your brake pads is essential for maintaining vehicle safety. If you’re curious about how to ensure your brakes function reliably, you’re in the right place.
To check your brake pads, look for thickness, listen for noise, and pay attention to response. Regular inspection can prevent costly repairs and ensure safety.
Understanding Brake Pads

What are Brake Pads?
Brake pads are essential components of a vehicle’s braking system. They are flat, rectangular pieces made from various materials, including ceramic, metallic, and organic compounds. When you press the brake pedal, these pads press against the brake rotor, creating friction that slows down the wheels and, ultimately, the vehicle.
Importance of Brake Pads
The primary function of brake pads is to ensure safe stopping power. Their importance lies in their ability to provide control and safety while driving. Worn-out brake pads can lead to decreased braking efficiency, longer stopping distances, and increased risk of accidents.
Tip: Regularly checking your brake pads can prevent costly repairs and enhance safety.
To check your brake pads, follow these simple steps:
- Visual Inspection: Look through the wheel spokes. The outer pad will be pressed against a metal rotor. If you see less than 1/4 inch of pad, it’s time for a replacement.
- Listen for Noise: A high-pitched screeching noise when braking can indicate worn pads. This sound is from a metal shim, called an indicator, which makes noise when pads are worn.
- Feel for Vibrations: If the brake pedal vibrates or feels shaky, it might be due to worn pads or a warped rotor.
Regular checks can help maintain optimal brake performance. If you’re unsure about inspecting your brake pads, consult a professional mechanic to ensure your vehicle’s safety.
Tools Needed for Inspection
Basic Tools
To effectively check your brake pads, having the right tools is essential. Here’s a list of what you’ll need:
- Jack and Jack Stands: These will lift your vehicle safely, allowing access to the wheels and brake components.
- Lug Wrench: This tool is necessary to remove the lug nuts holding your wheels in place.
- Socket Set: A set of sockets will help remove the caliper bolts, which is crucial for accessing the brake pads.
- Torque Wrench: Use this to ensure lug nuts are tightened to the manufacturer’s specifications when reassembling.
- Brake Pad Thickness Gauge: This tool helps measure the remaining thickness of your brake pads, ensuring they meet safety standards.
- Flashlight: A good light source is necessary to see clearly while inspecting the brake pads and related components.
Safety Gear
Your safety should always be a priority. Make sure you have the following safety gear:
- Gloves: Protect your hands from sharp edges and dirt while working on your vehicle.
- Safety Glasses: These will protect your eyes from dust, debris, and any accidental splashes of brake fluid.
- Protective Clothing: Wear clothing that covers your skin to prevent injuries and keep your clothes clean.
- Wheel Chocks: These prevent the vehicle from rolling while elevated, ensuring a stable and safe work environment.
Tip: Always work on a flat and stable surface to reduce the risk of accidents when using a jack and stands.
Preparing the Vehicle

Parking Safely
Begin by parking your vehicle on a flat, stable surface. This ensures the car won’t roll when you lift it. Turn off the engine and engage the parking brake. If you’re working in a driveway, make sure there’s enough space around the car for you to move freely.
Lifting the Vehicle
To access the brake pads, you’ll need to lift the vehicle. Safety is the priority here:
- Gather Your Tools: You’ll need a car jack and jack stands. A lug wrench is also essential for removing tire bolts.
- Locate the Jack Points: Check your vehicle’s manual to find the designated jack points under the car. These are typically reinforced spots on the vehicle’s frame.
- Position the Jack: Slide the jack under the car, aligning it with the jack point. Slowly lift the vehicle until the tire is off the ground.
- Secure with Jack Stands: Place jack stands under the vehicle, near the jack points, and gently lower the car onto them. The jack stands provide stability while you work, reducing the risk of the car falling.
- Remove the Wheel: Use the lug wrench to loosen and remove the bolts, then take off the wheel to reveal the brake components.
Tip: Always use jack stands in addition to the jack. Never rely solely on the jack to hold the car up while you work.
Locating the Brake Pads
Removing the Wheel
To access the brake pads, you will first need to remove the wheel. Here’s how you can do it:
- Park Safely: Make sure your vehicle is on a flat surface. Engage the parking brake and place wheel chocks behind the wheels that won’t be lifted.
- Loosen Lug Nuts: Use a lug wrench to slightly loosen the lug nuts on the wheel you want to remove. Do this while the wheel is still on the ground to prevent it from spinning.
- Lift the Vehicle: Position a jack under the vehicle’s designated jacking point. Consult your owner’s manual if unsure. Raise the vehicle until the wheel is off the ground.
- Secure the Vehicle: Place a jack stand under the car for safety. Never rely solely on the jack to hold the vehicle.
- Remove Lug Nuts: Finish removing the lug nuts completely. Keep them in a safe place so they don’t get lost.
- Remove the Wheel: Carefully take the wheel off and set it aside. You now have access to the brake assembly where the brake pads are located.
Tip: If a lug nut feels stuck, try applying a bit of penetrating oil and wait a few minutes before trying again.
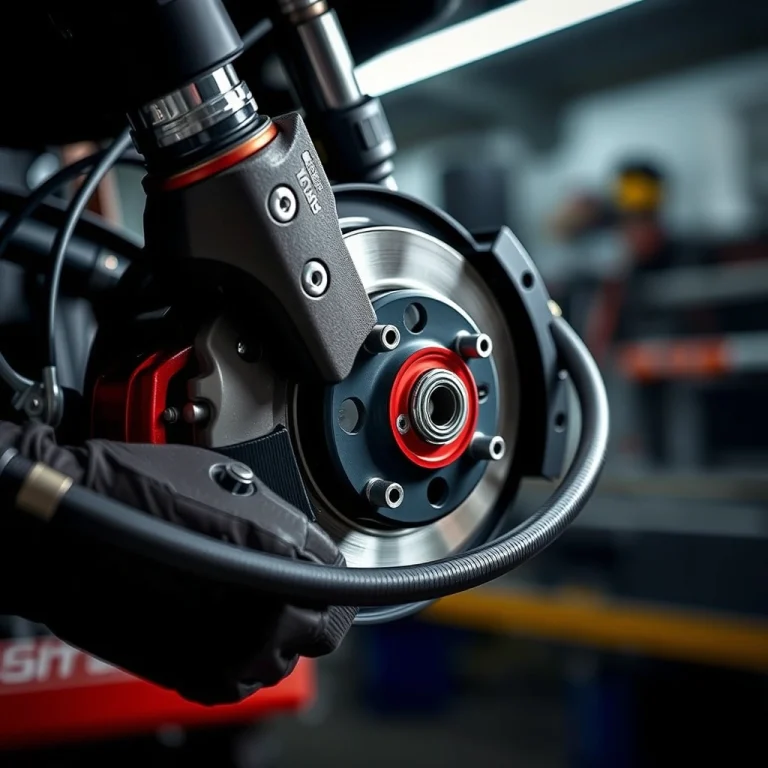
With the wheel removed, you are ready to inspect the brake pads. Look through the caliper to see how much of the pad remains. Typically, if the pad thickness is less than 1/4 inch, it may be time for a replacement.
Inspecting Brake Pad Thickness
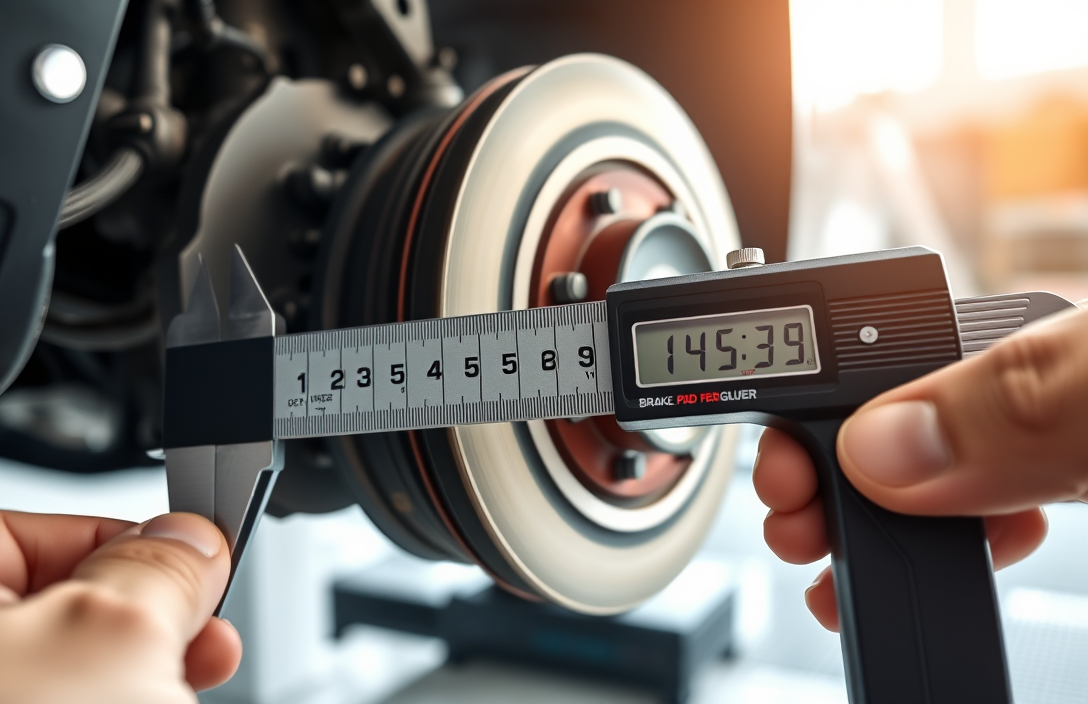
Using a Brake Pad Gauge
To accurately measure brake pad thickness, a brake pad gauge is your best tool. This device provides precise measurements and can help determine if replacement is necessary. Here’s how to use it:
- Access the Brake Pads: Safely lift the vehicle using a jack and secure it with jack stands. Remove the wheel to expose the brake caliper and pads.
- Position the Gauge: Place the brake pad gauge against the pad. The gauge will indicate the remaining thickness.
- Interpret the Measurement: Compare the reading with manufacturer guidelines. Typically, brake pads should be replaced when they are worn down to 3mm or less.
Visual Inspection
While a gauge provides precision, a visual inspection offers a quick overview:
- Look for Wear: Inspect the brake pad through the caliper. If the pad looks thin or unevenly worn, it may need replacing.
- Check for Indicators: Some brake pads have wear indicators, small metal tabs that make noise when the pad is worn. If you hear a squealing sound during braking, it could be a sign to change the pads.
- Examine the Surface: Look for cracks, glazing, or deep grooves on the pad surface. These signs indicate that the pad isn’t performing effectively.
Tip: Always refer to your vehicle’s maintenance manual for specific recommendations regarding brake pad thickness and replacement intervals.
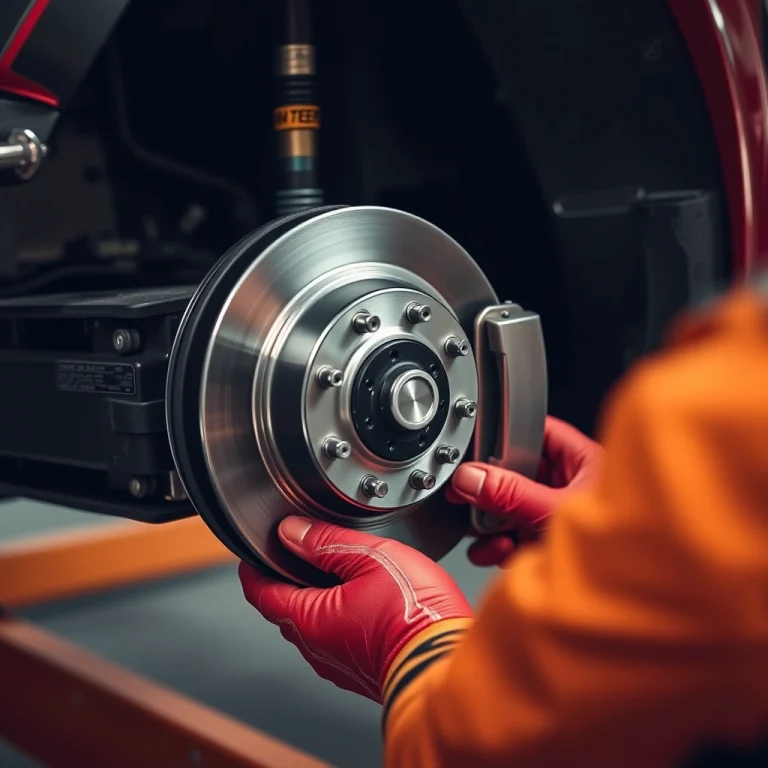
Checking for Uneven Wear
Signs of Uneven Wear
Checking your brake pads for uneven wear is a straightforward process that can help you catch problems early. Begin by removing the wheel to access the brake pads. Look for these signs:
- Uneven Surface: One side of the pad is more worn than the other.
- Tapering: The pad is thinner at one end.
- Grooves or Cracks: Visible marks or splits in the pad material.
Causes of Uneven Wear
Uneven wear can result from several issues, which are important to address to maintain effective braking:
- Caliper Malfunction: A sticking caliper can cause one pad to wear out faster.
- Improper Installation: Pads not seated correctly lead to uneven pressure.
- Warped Rotors: Uneven rotor surfaces can make pad wear inconsistent.
- Suspension Problems: Issues here can affect how evenly the brake applies pressure.
Regular inspections and addressing these issues promptly will help ensure your brake pads wear evenly.
Evaluating Brake Pad Condition
Cracks and Glazing
When examining brake pads for cracks, inspect both the surface and the edges. Cracks can develop from excessive heat or wear and may indicate that the pads need replacing. Use a flashlight to see small cracks that are less visible.
Glazing occurs when the brake pad surface becomes smooth and shiny. This can happen if the brakes are used too hard or too lightly for extended periods. Test for glazing by gently running a fingernail across the pad surface. A slick, glass-like surface means the pad has glazed and may not provide adequate friction.
Contamination
Contamination often occurs due to brake fluid, grease, or oil reaching the brake pads, reducing their effectiveness. Look for any dark, greasy spots or a sticky residue on the pad surface.
- Visually inspect the pads for any signs of moisture or residue.
- If contamination is present, clean the area around the pads and rotors with a suitable brake cleaner.
- In severe cases, it might be necessary to replace the contaminated pads entirely.
Tip: Always handle brake components with clean hands or gloves to prevent introducing any additional contaminants.
By regularly checking for cracks, glazing, and contamination, you ensure that your brake pads remain in good condition, keeping you safe on the road.
Reassembling and Testing
Reattaching the Wheel
Begin by aligning the wheel with the wheel hub. Ensure the bolt holes are properly aligned before inserting the lug nuts. Hand-tighten each lug nut in a crisscross pattern to ensure even distribution. Once all nuts are hand-tightened, use a torque wrench to tighten them to the manufacturer’s specified torque settings. This prevents the wheel from becoming loose while driving.
Tip: Always use a torque wrench for final tightening to prevent over-tightening, which can damage the threads.
Test Drive
After reattaching the wheel, lower the vehicle carefully to the ground. Before heading out, pump the brake pedal several times to ensure the brake pads are seated properly. This step is essential for restoring full braking power.
- Initial Checks: As you start driving, listen for unusual noises like grinding or squealing, which might indicate improper installation.
- Brake Response: Test the brakes at low speeds first. The pedal should feel firm and responsive.
- Emergency Stop: Perform a controlled emergency stop in a safe area. The vehicle should stop smoothly without pulling to one side.
If everything feels normal, you can increase your speed gradually and check the brakes at higher speeds. If there are any issues, such as a spongy pedal or pulling to one side, inspect your work to ensure everything is correctly installed.
Quick Summary
- Ensure the vehicle is on a flat surface and safely secured before starting any inspection.
- Locate the brake caliper and examine the brake pads through the caliper’s inspection hole or by removing the wheel.
- Check the thickness of the brake pad; if it’s less than 1/4 inch, it’s time for replacement.
- Look for uneven wear, which may indicate a problem with the caliper or suspension.
- Listen for any unusual noises during braking, such as squealing or grinding, signifying worn pads.
- Inspect for visible signs of damage or cracks on the pads.
- Regular brake pad checks are recommended every 10,000 miles or as per the vehicle manufacturer’s guidelines.
Frequently Asked Questions
How can I tell if my brake pads need replacement?
Listen for any squealing or screeching noises when braking. Also, visually inspect the thickness of the brake pads; if they are less than a quarter of an inch thick, replacement is needed.
What tools do I need to check my brake pads?
You’ll need a flashlight, a jack, and a lug wrench. These tools will help you lift your vehicle and remove the wheels to access the brake pads.
How often should I check my brake pads?
It’s recommended to check your brake pads every 10,000 to 15,000 miles, or every time you have your tires rotated.
Can I check my brake pads without removing the wheels?
Yes, some vehicles have openings in the wheel that allow you to see the brake pads. Use a flashlight to look through the opening and check the pad thickness.
What should I do if my brake pads are worn out?
If your brake pads are worn out, replace them as soon as possible to ensure safety. You can do it yourself if you’re comfortable with vehicle maintenance or have a professional handle it.
- Find the Right Engine Oil for Your Car: A Quick Guide - March 1, 2026
- Car Battery Booster Basics: Start Your Vehicle in Minutes - March 1, 2026
- How Long Does It Take To Charge A Motorcycle Battery Charging Time Guide - February 28, 2026