How To Check Your Brakes A Diy Guide For Safety
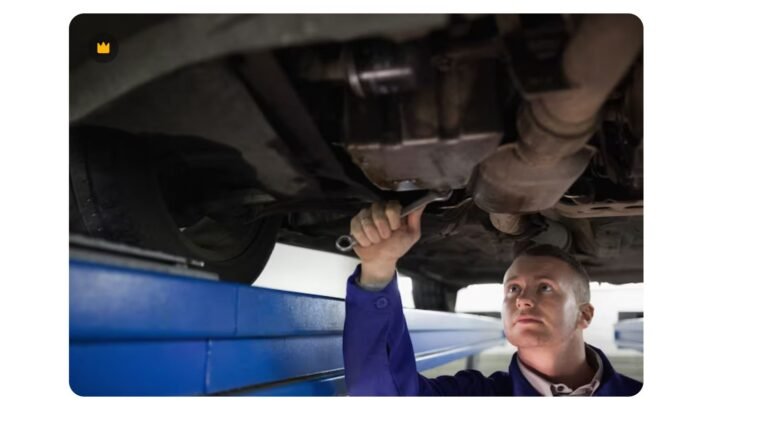
If you’re a hands-on car owner, checking your brakes might seem intimidating, but it’s actually a straightforward task that can prevent costly repairs and ensure your safety. Knowing how to do this can keep you confident on the road.
Begin by inspecting brake pads for wear, check brake fluid levels, and listen for unusual noises. These simple steps can help ensure your brakes are functioning properly, giving you peace of mind and control over your vehicle’s safety.
Understanding Brake System Components

Understanding your braking system is essential for maintaining vehicle safety. Here’s a brief overview of key components and how they function.
Brake Pads
Brake pads are the parts that press against the rotors to slow down your vehicle. They are made from high-friction materials that help stop the car when you press the brake pedal.
- Function: Generate friction to slow or stop wheel rotation.
- Check: Look for wear indicators – a squealing sound usually means they need replacing.
Brake Rotors
Rotors are the discs that brake pads clamp onto to create stopping power. They are typically made of cast iron and are designed to withstand high temperatures.
- Function: Provide a surface for the brake pads to press against.
- Check: Inspect for grooves or uneven wear. Warped rotors often cause a pulsating brake pedal.
Brake Calipers
Calipers are the devices that hold the brake pads and use hydraulic pressure to press them against the rotors.
- Function: Use brake fluid to apply pressure to the brake pads.
- Check: Look for leaks in the brake fluid or uneven wear on the pads, which may indicate caliper issues.
Tip: Regularly checking and maintaining your brake system can prevent costly repairs and ensure your vehicle is safe to drive.
Gathering Necessary Tools
Before getting started with inspecting your brakes, having the right tools on hand is essential for a smooth and effective process. Here’s a checklist to guide you:
- Jack and Jack Stands: You’ll need a reliable jack to lift your vehicle and jack stands to hold it securely in place. Safety is a priority.
- Lug Wrench: This tool will help you remove the wheel nuts to access the brakes.
- Brake Caliper Tool: Useful for compressing the caliper pistons when removing or installing brake pads.
- Brake Pad Thickness Gauge: This gauge helps measure the remaining thickness of your brake pads, ensuring they meet safety standards.
- Flashlight: A good flashlight will help you see clearly when inspecting brake components.
- Brake Fluid Tester: Handy for checking the condition of your brake fluid, which affects overall brake performance.
- Wire Brush: Use this to clean any rust or debris from brake components.
- Work Gloves: Protect your hands with a sturdy pair of gloves while handling tools and brake parts.
- Safety Goggles: Eye protection is important to guard against dust and debris.
Tip: Always inspect your tools before starting to ensure they are in good working condition. This can save you time and prevent accidents.
Initial Safety Precautions
Vehicle Stabilization
Before working on your brakes, ensure your vehicle is securely stabilized to prevent any unwanted movement. Start by parking the car on a flat, level surface. Engage the parking brake fully to minimize any risk of rolling.
- Use wheel chocks on the opposite end of the car you are working on. For instance, if you are checking the front brakes, place chocks behind the rear wheels.
- For added safety, lift the vehicle using a jack and place it securely on jack stands. Double-check that the stands are positioned correctly under the manufacturer-recommended lift points.
Personal Protective Equipment
Safety gear is important to protect yourself while inspecting brakes. Here’s what you might need:
- Gloves: Use gloves to avoid contact with dust and debris that can be harmful or irritating to the skin.
- Safety Goggles: Protect your eyes from dust particles that may become airborne during the inspection.
- Dust Mask: Brake dust can be harmful if inhaled, so wear a dust mask to prevent respiratory issues.
Tip: Always ensure your tools are in good condition and organized to prevent accidents or delays.
Following these safety measures will help you conduct your brake inspection with confidence and reduce the risk of injury.
Inspecting Brake Pads
Visual Inspection
Start by inspecting the brake pads through the wheel. Look for a shiny, metallic surface, which indicates wear. If the pads appear thin or you see less than 3mm of pad material, it’s time to consider replacing them. Check for any uneven wear patterns, as this could point to issues with the brake caliper or rotor.
Measuring Pad Thickness
If you have access to a jack and are comfortable removing a wheel, measure the thickness of the brake pads. Use a ruler or a dedicated brake pad gauge. Ideally, brake pads should be more than 6mm thick. If they are between 3-4mm, plan for replacement soon. Less than 3mm means immediate replacement is necessary.
Tip: Always measure the pads at multiple points to ensure even wear.
After inspection, make sure to reassemble everything properly and check that all bolts are tightened to the manufacturer’s specifications to ensure your safety on the road.
Checking Brake Rotors

Visual Surface Check
Begin by examining the surface of each rotor. Look for any grooves, scoring, or uneven wear. These are signs that the rotor has been in contact with worn brake pads or debris. If the rotor surface appears smooth and without significant marks, it is likely in good condition.
Rust is another factor to consider. Light surface rust can often be cleaned off with regular braking, but deep rust can compromise the rotor’s integrity. If rust appears to be more than just surface-level, consider further action.
Rotor Thickness Measurement
After the visual check, measure the rotor’s thickness. This requires a micrometer or a caliper, instruments that can precisely measure the rotor’s width. Most vehicles have a minimum rotor thickness specification, which you can find in the vehicle’s service manual.
- Step 1: Ensure the car is on a flat surface and the wheels are safely removed.
- Step 2: Use the micrometer to measure the rotor thickness at multiple points around the rotor’s surface to ensure accuracy.
- Step 3: Compare these measurements to the minimum specification. If the rotor is below the specified thickness, it should be replaced.
Tip: Always measure the rotor thickness in several spots around its surface. Uneven wear can lead to inaccurate measurements if only checked at one point.
Evaluating Brake Fluid
Fluid Level
Start by locating the brake fluid reservoir under the hood. It’s usually near the back on the driver’s side and marked with a cap labeled ‘Brake Fluid.’ Before opening the cap, wipe any dirt away to prevent contamination.
Check the fluid level by looking at the markings on the side of the reservoir. It should be between the ‘MIN’ and ‘MAX’ lines. If it’s below ‘MIN,’ it may indicate a leak or the need for a brake pad replacement. In such cases, avoid adding fluid without consulting a professional, as this may mask underlying issues.
Fluid Quality
Assess the quality of the brake fluid by observing its color. Fresh brake fluid is usually clear or light amber. If the fluid is dark brown or black, it may be time for a change, as old fluid can reduce braking efficiency.
Tip: A quick way to test for moisture in the fluid is to dip a strip of test paper designed for brake fluid. These strips are available at most auto parts stores and can indicate if water content is too high.
Always ensure you use the correct type of brake fluid specified in your vehicle’s manual when topping up or replacing it. Using the wrong type can damage the brake system.
Regularly inspecting your brake fluid is a simple step that can prevent more serious issues and ensure your vehicle’s braking system remains responsive and safe.
Testing Brake Functionality
Testing your car’s brake functionality is a straightforward task that can help ensure your safety on the road. Below are two simple methods to assess how well your brakes are performing.
Road Test
Find a safe, open space where you can drive at a moderate speed. Pay attention to how the brakes feel when you apply them.
- Pedal Response: The brake pedal should be firm and respond quickly when pressed. If it feels spongy or requires more pressure than usual, there may be air in the brake lines or an issue with the brake fluid.
- Stopping Distance: The vehicle should come to a smooth stop without pulling to one side. If it takes longer to stop, it might indicate worn brake pads or other issues.
Listening for Unusual Noises
While driving, listen for any sounds that occur when you apply the brakes.
- Squealing or Squeaking: These sounds often mean that the brake pads are wearing thin and need replacement.
- Grinding: A grinding noise could indicate that the brake pads are completely worn down, and metal is rubbing against metal, which requires immediate attention.
Tip: Regularly check your brake fluid level and quality. Low or contaminated fluid can affect brake performance.
By conducting these simple tests, you can identify potential brake issues early and address them before they become more serious, ensuring your vehicle remains safe to drive.
When to Seek Professional Help
Signs of Severe Wear
While inspecting your brakes, certain signs indicate that professional help is necessary. If you notice any of the following, it’s time to consult an expert:
- Deep Grooves: If your brake rotors or drums have deep grooves, they could be compromised. This might lead to reduced braking efficiency.
- Excessive Rust: While some surface rust is normal, significant rust can weaken brake components. If rust is widespread, a professional assessment is advisable.
- Thin Brake Pads: Brake pads thinner than 1/4 inch should be replaced. Attempting to use them beyond this point is unsafe.
Unusual Brake Behavior
If your brakes exhibit unusual behavior, it’s wise to seek professional assistance:
- Spongy Pedal: A brake pedal that feels soft or spongy may indicate air in the brake lines or fluid leaks. This reduces braking effectiveness and needs immediate attention.
- Pulling to One Side: If your vehicle pulls to one side when braking, this could signal uneven brake pad wear or a malfunctioning caliper.
- Squealing or Grinding Noises: Persistent noises often mean worn pads or damaged rotors, requiring expert inspection and repair.
- Vibrations: A vibrating brake pedal can indicate warped rotors. This affects braking performance and necessitates professional intervention.
While DIY brake checks can be a good practice, certain situations demand the expertise of a skilled technician. Trusting a professional with these critical issues ensures your safety and extends the lifespan of your braking system.
Quick Summary
- Regular brake checks are essential for safety and can prevent costly repairs.
- Listen for unusual noises such as squeaking or grinding, which could indicate worn-out brake pads.
- Feel the brake pedal for unusual softness or resistance, as this may suggest air in the brake lines or a fluid leak.
- Inspect brake fluid levels, ensuring they are at the recommended level and the fluid is clear, not dark or murky.
- Check tire wear patterns; uneven wear might suggest brake issues that need addressing.
- Observe if the vehicle pulls to one side when braking, which may indicate brake caliper or pad problems.
- Regularly examine the brake rotors for visible damage or excessive wear.
Frequently Asked Questions
How can I tell if my brakes need to be checked?
Listen for squeaking or grinding noises when you apply the brakes. Another sign is if the car pulls to one side when braking.
What tools do I need to check my brakes?
You’ll need a jack, lug wrench, and a flashlight to inspect the brake pads and rotors. A brake pad thickness gauge can also be useful.
How often should I check my brakes?
It’s advisable to check your brakes every 6 months or whenever you notice changes in braking performance. Regular inspections help prevent more serious issues.
What should I look for when inspecting brake pads?
Check the thickness of the brake pads. If they are less than a quarter of an inch thick, it’s time for a replacement.
Can I check my brakes without removing the wheels?
While you can visually inspect some brake components without removing the wheels, a thorough check usually requires wheel removal to examine pads and rotors closely.
- Find the Right Engine Oil for Your Car: A Quick Guide - March 1, 2026
- Car Battery Booster Basics: Start Your Vehicle in Minutes - March 1, 2026
- How Long Does It Take To Charge A Motorcycle Battery Charging Time Guide - February 28, 2026