How To Fix Oil Leak Simple Steps To Stop Leaks Fast
Oil leaks can leave unsightly stains on your driveway and lead to more serious engine issues if not addressed promptly. Tackling this common automotive problem doesn’t have to be daunting, and with the right guidance, you can fix it yourself.
Identify the source, gather necessary tools, and replace or seal the faulty part to stop the leak effectively.
Understanding Oil Leaks

Causes of Oil Leaks
Oil leaks in vehicles typically occur due to worn-out seals and gaskets, damaged oil pans, or deteriorating engine parts. Over time, seals and gaskets may dry out or crack, causing oil to seep through. Another common culprit is an improperly installed or loose oil filter. Additionally, high engine temperatures can break down oil, which may lead to leaks.
Common Signs of Oil Leaks
Recognizing an oil leak early can save you from costly repairs. Here are some indicators:
- Oil spots under the car: Check for dark, greasy spots on your driveway or garage floor.
- Burning oil smell: If oil drips onto hot engine parts, it can produce a noticeable burning odor.
- Low oil level: Regularly monitor your oil level. A consistent drop without visible leaks might indicate an internal issue.
- Engine warning light: This may illuminate if the oil level is critically low.
If you identify any of these signs, it’s essential to locate and address the source of the leak promptly.
Tools and Materials Needed
To effectively address an oil leak, having the right tools and materials at your disposal is essential. Here’s a list of what you’ll need:
- Wrenches and Sockets: A comprehensive set of wrenches and sockets is crucial for disassembling parts that may obstruct your access to the leaking area. Preferably, have both metric and standard sizes.
- Screwdrivers: Both flathead and Phillips screwdrivers are necessary for removing smaller components around the engine.
- Oil Catch Pan: This will help you collect any oil that drains out during the repair process, keeping your work area clean and safe.
- Gasket Scraper: Use this tool to remove old gasket material that might be causing the leak, ensuring a clean surface for the new gasket.
- Gasket Sealant: A high-quality sealant can help ensure a tight seal when replacing gaskets.
- Replacement Gaskets: Depending on the source of the leak, you may need new oil pan or valve cover gaskets.
- Torque Wrench: This tool ensures you tighten bolts to the manufacturer’s specifications, preventing further leaks due to overtightening or undertightening.
- Shop Rags or Paper Towels: These are useful for wiping away oil and grime, keeping your engine components clean during repairs.
- Gloves and Safety Glasses: Personal protective equipment is vital to protect your skin and eyes from oil and debris.
Tip: Before starting, check your vehicle’s manual to confirm the specific tools and gasket types needed for your car model.
Diagnosing the Leak Source
Identifying the source of an oil leak is an essential first step in addressing the issue. Here’s how you can pinpoint the leak accurately:
Visual Inspection
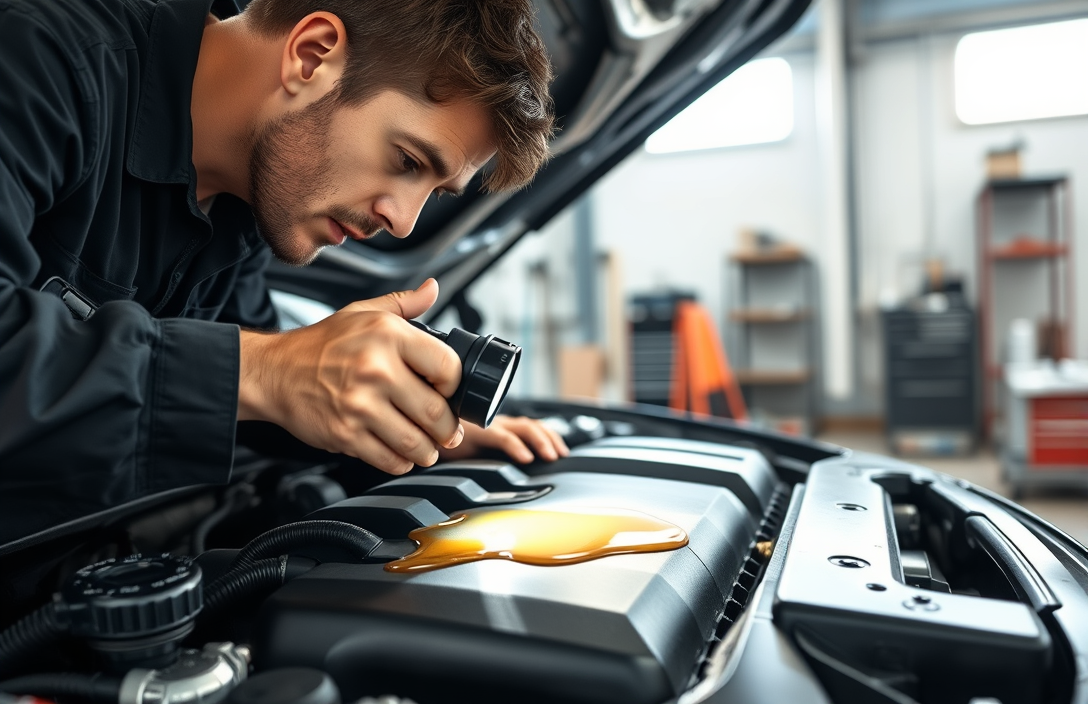
Begin by cleaning the engine area thoroughly to remove old oil and grime. This makes it easier to see fresh leaks. Once clean, run the engine for a few minutes and then inspect it closely.
- Look for fresh oil around seals and gaskets, such as valve covers, oil pan, and the timing cover.
- Check for drips under the car, noting the location to trace back to the leak’s origin.
Using Fluorescent Dye
If the visual inspection isn’t conclusive, consider using a fluorescent dye. Add the dye to your engine oil, run the engine, and then use a UV light to trace the dye path.
- Ensure you wear protective eyewear when using UV light.
- Follow the dye trail to pinpoint the exact leak location.
Pressure Testing
Pressure testing can help find leaks in the oil system. This method involves pressurizing the oil system to simulate operation.
- Use a pressure tester designed for oil systems.
- Check for leaks at connections and hoses under pressure.
Tip: Address any visible leaks immediately to prevent further damage to your engine.
Fixing Valve Cover Gasket Leaks
Removing the Valve Cover
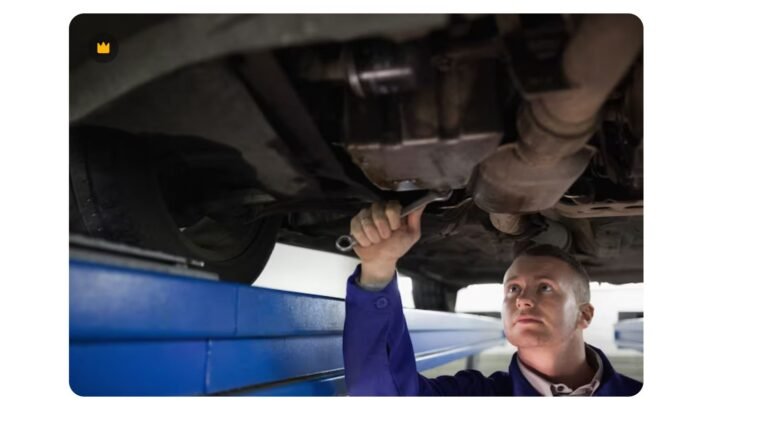
Start by ensuring the engine is cool to avoid burns. Disconnect the battery to prevent any electrical issues. Remove any components obstructing access to the valve cover, such as the spark plug wires. Use a socket wrench to carefully unbolt the valve cover. Gently lift the cover off, taking care not to damage it or the surrounding components.
Replacing the Gasket
With the valve cover removed, the old gasket should be visible. Carefully peel off the old gasket. Clean both the valve cover and the cylinder head surface with a suitable cleaner to remove oil and debris. This ensures a clean seal. Fit the new gasket onto the valve cover. Ensure it is seated properly in the groove to prevent future leaks.
Reassembling
Position the valve cover back over the engine, aligning it with the bolt holes. Hand-tighten the bolts in a crisscross pattern to distribute pressure evenly. Use a torque wrench to tighten them to the manufacturer’s specifications. Reattach any components that were removed, such as spark plug wires, and reconnect the battery.
Tip: Always check your vehicle’s manual for specific torque settings and any unique instructions related to your car model.
Start the engine and let it run for a few minutes. Check for leaks and, if all looks good, take the car for a short test drive to ensure everything is functioning properly.
Repairing Oil Pan Leaks
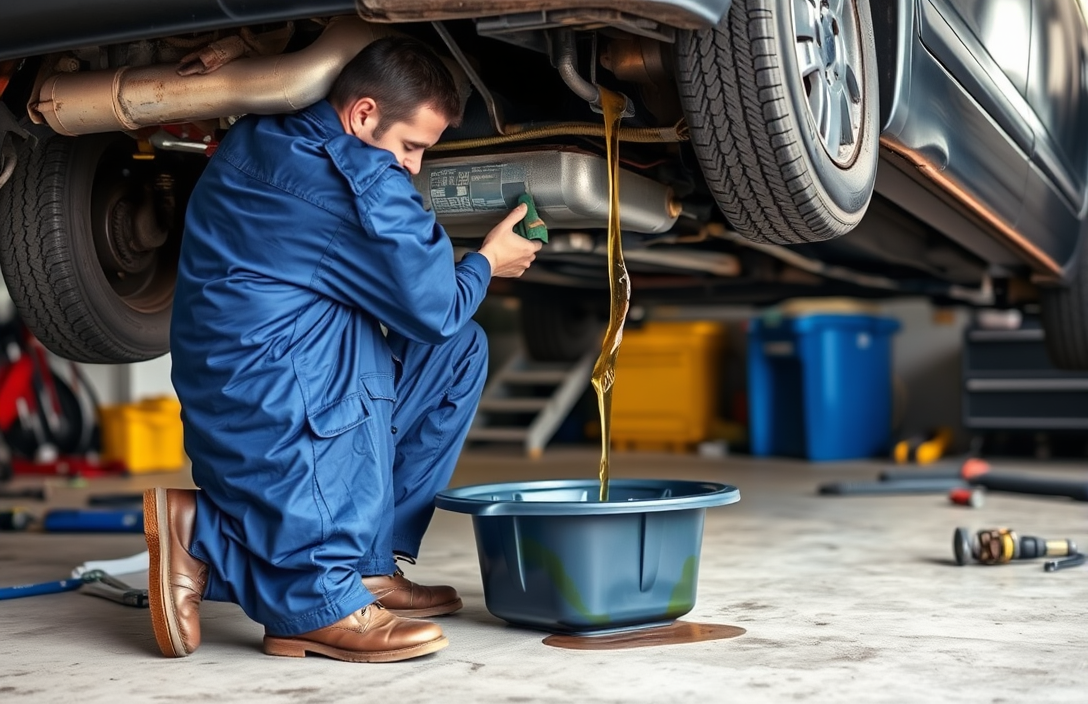
Draining Oil
To repair an oil pan leak, it’s essential to start by draining the oil from the pan. This prevents spills and gives you clear access. Follow these steps:
- Ensure your vehicle is parked on a level surface and the engine is cool.
- Place an oil drain pan beneath the oil pan’s drain plug.
- Using a wrench, loosen and remove the drain plug, allowing the oil to fully drain into the pan.
Removing Oil Pan
Once the oil is drained, the next step involves removing the oil pan:
- Locate and remove any bolts securing the pan using a socket wrench.
- If the pan is stuck, gently tap it with a rubber mallet to loosen it – avoid using a screwdriver, as this might damage the surface.
- Carefully lower the oil pan and set it aside.
Installing New Gasket
After the pan is removed, focus on replacing the old gasket to stop the leak:
- Thoroughly clean the mating surface on both the engine and oil pan to remove old gasket material and debris.
- Place the new gasket onto the oil pan, ensuring it is properly aligned with the bolt holes.
- Reattach the oil pan to the engine, tightening the bolts in a criss-cross pattern to ensure even pressure.
Tip: Use a torque wrench to tighten the bolts to the manufacturer’s specified torque setting for a secure seal.
Addressing Oil Filter Housing Leaks
Removing the Oil Filter
First, ensure your vehicle is on a level surface and the engine is cool. Use an oil filter wrench to carefully remove the oil filter. Be prepared for some oil to spill, so have a catch pan ready. Once removed, check for any old gasket material that may have adhered to the engine block.
Inspecting the Housing
After removing the filter, inspect the oil filter housing. Look for visible cracks or signs of wear, as these can cause leaks. Cleaning the area with a degreaser will help reveal any hidden damage. If the housing is damaged, it needs replacement.
Installing New Seals
If the housing is in good condition, focus on the seals. Old or damaged seals are common culprits of leaks. Remove the old seals and clean the seating area thoroughly. Install new seals, ensuring they are seated properly without twists or misalignments.
Reattach the oil filter housing to the engine block, ensuring it is tightened to the manufacturer’s specifications. Reinstall a new oil filter, checking that its gasket is lubricated with fresh oil for a proper seal. Start the engine and check for leaks around the housing and filter.
Tip: Always double-check that all components are free of oil and debris before reassembly to ensure a proper seal.
Preventing Future Oil Leaks
Regular Maintenance
Maintaining your vehicle regularly is essential in preventing oil leaks. Routine inspections can catch early signs of wear or damage to seals and gaskets. Ensure that oil changes are performed at recommended intervals, as fresh oil and clean filters help maintain engine health. Check for any loose bolts or components that may lead to leaks over time.
Monitoring Oil Levels
Keep a close eye on your oil levels. Regular checks can alert you to a potential leak before it becomes significant. Use the dipstick to check oil levels at least once a month. If you notice a sudden drop, investigate immediately to identify the source of the leak.
Using Quality Seals
Invest in high-quality seals and gaskets when replacements are necessary. Cheaper alternatives may not provide the same level of durability and resistance to the high temperatures and pressures within an engine. Quality parts are a wise investment to ensure long-lasting protection against leaks.
Tip: Always refer to your vehicle’s manual for the correct specifications when purchasing replacement parts.
By incorporating these practices into your vehicle care routine, you can significantly reduce the chances of encountering oil leaks in the future. Regular attention and quality components are key to a well-maintained vehicle.
When to Seek Professional Help
Complex Leak Scenarios
While some oil leaks can be addressed with basic tools and a bit of elbow grease, certain situations require professional attention. If the oil leak stems from the rear main seal or the head gasket, these are complex components that demand expertise in engine disassembly. Attempting to fix such leaks without a thorough understanding can lead to more damage and increased costs.
Lack of Tools
Proper tools are essential for an effective repair. If you find yourself lacking the right equipment, it’s wise to consult a mechanic. Professionals have access to specialized tools like torque wrenches, engine lifts, or advanced diagnostic machines, which ensure the job is done correctly and efficiently.
Safety Concerns
Safety should never be compromised. Working on your vehicle involves risks, especially if you’re dealing with parts under high pressure or those that require lifting the car. If you’re unsure about the safety measures or feel uncomfortable handling heavy or complex components, it’s best to seek professional help. A certified mechanic can ensure the repair is not only effective but also safe for you and your vehicle.
Tip: Regular maintenance checks by a professional can prevent leaks from occurring in the first place.
Quick Summary
- Identify the source of the oil leak by inspecting common areas such as the oil pan gasket, valve cover gasket, and oil filter.
- Ensure the vehicle is safely elevated and secured before starting any repair work to avoid accidents.
- Replace worn or damaged gaskets, seals, or O-rings to stop the leak. Common replacements include oil pan gaskets and valve cover gaskets.
- Check and tighten any loose bolts or components around the engine area as loose fittings can often lead to oil leaks.
- Regularly check the oil level and condition to ensure the engine is not running low or with contaminated oil, which can exacerbate leaks.
- Use high-quality replacement parts and appropriate tools to ensure a lasting fix and prevent future leaks.
- Consider using an oil leak additive temporarily if a full repair isn’t immediately feasible, but plan for a permanent solution as soon as possible.
Frequently Asked Questions
What are the common causes of an oil leak in a car?
Common causes include degraded gaskets, worn-out seals, and loose oil pans. Over time, these components can deteriorate due to heat and pressure.
How can I identify where the oil leak is coming from?
Start by inspecting the engine and surrounding areas for oil stains or drips. Using a flashlight can help you spot leaks more effectively.
What tools and materials do I need to fix an oil leak?
You’ll need a wrench set, oil catch pan, replacement gaskets or seals, and a flashlight. Having a repair manual for your vehicle can also be helpful.
Is it safe to drive a car with an oil leak?
Driving with an oil leak can be risky as it may lead to engine damage. It’s advisable to fix the leak as soon as possible to prevent further complications.
How long does it typically take to repair an oil leak?
The time required can vary depending on the leak’s severity and location. Generally, minor repairs can take a few hours, while more complex issues may require a full day.
- Find the Right Engine Oil for Your Car: A Quick Guide - March 1, 2026
- Car Battery Booster Basics: Start Your Vehicle in Minutes - March 1, 2026
- How Long Does It Take To Charge A Motorcycle Battery Charging Time Guide - February 28, 2026