
How To Fix Transmission Leak Diy Guide By An Expert Technician
Transmission leaks can be troubling for any car owner, often leading to bigger issues if not addressed early. With some patience and the right guidance, fixing these leaks yourself can be a rewarding task for any DIY enthusiast.
Key points: Identify the leak source, gather tools, replace damaged seals, and ensure proper fluid levels.
Understanding Transmission Leaks

Causes of Leaks
Transmission leaks can occur for several reasons, and understanding these can help in addressing the issue effectively. Common causes include:
- Worn Seals and Gaskets: Over time, seals and gaskets can degrade, leading to fluid escaping from the transmission.
- Damaged Pan: The transmission pan can get damaged due to road debris, resulting in leaks.
- Loose or Missing Bolts: Bolts that secure the transmission components might loosen or go missing, causing leakage.
- Faulty Torque Converter: If the torque converter has a crack or is otherwise compromised, it may leak fluid.
Symptoms of Transmission Leaks
Identifying a transmission leak early can prevent further damage. Here are some symptoms to watch for:
- Fluid Puddles: Finding red or brown fluid under your vehicle is a clear sign of a leak.
- Low Fluid Levels: Regularly checking the transmission fluid level can reveal a leak if levels are consistently low.
- Slipping Gears: If the transmission is not engaging smoothly, it might be due to low fluid from a leak.
- Burning Smell: A burning smell can indicate fluid leaking onto hot engine parts.
Tip: Use a clean, white cloth to check fluid color under your vehicle. Transmission fluid is typically red or brown.
Tools and Materials Needed
Before you start fixing a transmission leak, gather the necessary tools and materials to make the task more efficient. Having everything on hand will save you time and frustration.
- Socket Set: A comprehensive socket set will help you remove and tighten bolts and nuts.
- Wrench Set: Open-end or adjustable wrenches are essential for reaching tight spots.
- Screwdrivers: Both flathead and Phillips screwdrivers are necessary for various components.
- Drain Pan: Use a large pan to catch any leaking fluid when you open the transmission system.
- Funnel: A funnel is crucial for refilling transmission fluid without spillage.
- Transmission Jack or Floor Jack: You’ll need a lift to safely raise the vehicle if needed.
- Jack Stands: Ensure stability and safety while working under the vehicle.
- Transmission Fluid: Check your vehicle’s manual for the correct type and have extra on hand.
- Gasket Scraper: Useful for removing old gasket material.
- Replacement Gaskets or Seals: Identify the leak source to determine which gaskets or seals are needed.
- Safety Gear: Safety glasses and gloves protect you from fluid splashes and sharp edges.
- Shop Rags or Towels: Handy for cleaning up spills and keeping your work area tidy.
Having these tools and materials ready will streamline your repair process and help ensure a successful fix. Always prioritize safety by using the appropriate gear and supports when working under a vehicle.
Initial Diagnosis
Visual Inspection
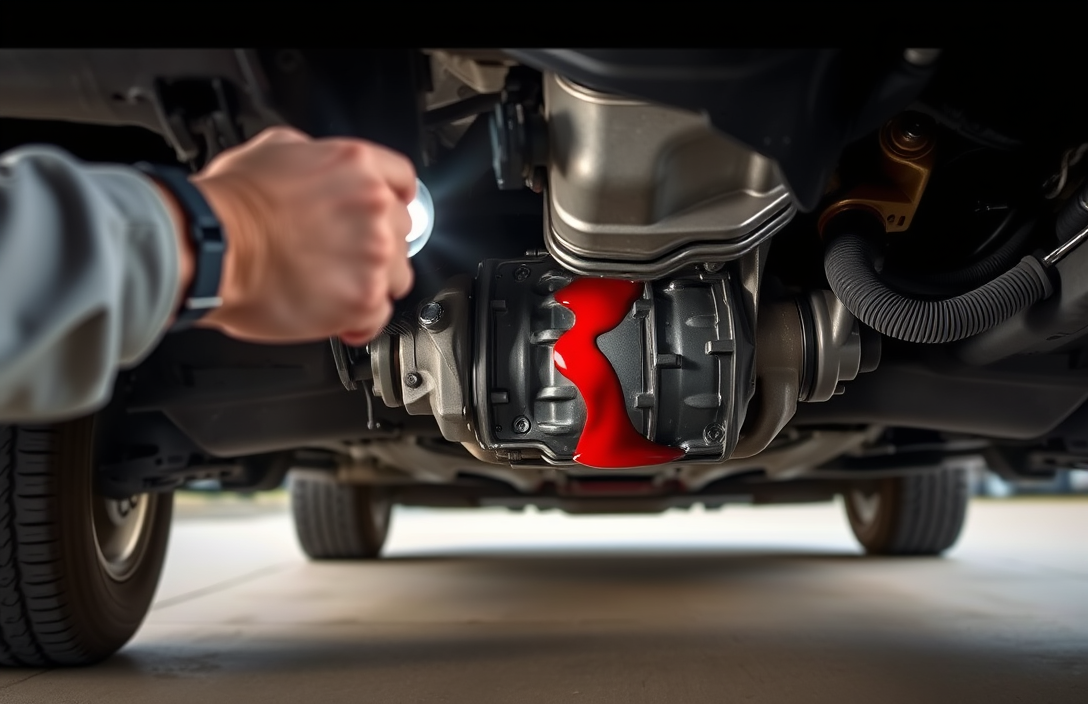
Start by parking your vehicle on a level surface. Engage the parking brake to ensure safety. Slide under the car with a flashlight and inspect the transmission area thoroughly. Look for reddish fluid around the transmission pan, gaskets, or seals. Pay special attention to any wet areas, as these are likely leak points.
Fluid Level Check
With the engine warm and running, locate the transmission dipstick. Pull it out, wipe it clean, then reinsert and remove it again to check the fluid level. The fluid should be within the marked range on the dipstick. If it’s low, this may indicate a leak. Additionally, examine the color and smell of the fluid. It should be a clear red color and not have a burnt odor.
Use of Diagnostic Tools
Consider using UV dye for a more precise leak detection. Add the dye to the transmission fluid and drive the vehicle for a short distance. Using a UV flashlight, inspect the transmission area again. The dye will glow under the UV light, pinpointing the leak source. This method is particularly useful for detecting small or hard-to-find leaks.
Tip: Always wear safety goggles and gloves when working with automotive fluids to protect your skin and eyes.
Identifying Leak Locations
Gaskets and Seals
Start by inspecting the gaskets and seals. These are common culprits for leaks in the transmission system. Check around the transmission case, paying close attention to the point where the engine and transmission connect. Look for any cracks or deformations in the seals. A flashlight can help you spot leaks more easily.
Tip: If you have access to UV dye, adding it to the transmission fluid can highlight leak areas under a UV light.
Transmission Pan
The transmission pan is another frequent source of leaks. Examine the pan bolts to ensure they are tightened to the manufacturer’s specifications. Be careful not to overtighten, as this can warp the pan or damage the gasket. Also, inspect the pan gasket for signs of wear or damage. If you see any fluid on the pan’s exterior, it’s a sign that the gasket may need replacing.
Fluid Lines and Cooler
Transmission fluid lines and the cooler can also develop leaks, especially at connection points. Inspect the lines for any signs of wear, cracks, or loose connections. Check where the lines connect to the radiator and transmission. If you notice any fluid around these areas, tightening the connections or replacing damaged lines might be required.
Tip: Use a clean, dry cloth to wipe suspected areas. If they become wet again, you’ve likely found the leak source.
Repairing Gaskets and Seals
Replacing Gaskets
To repair a transmission leak caused by faulty gaskets, start by identifying the leaking gasket, often found around the transmission pan. Here’s how you can replace it:
- First, ensure the vehicle is cool and safely elevated using jack stands.
- Drain the transmission fluid by removing the drain plug or pan bolts.
- Carefully remove the transmission pan and the old gasket.
- Clean the pan thoroughly, removing any old gasket material or debris.
- Position the new gasket on the pan, ensuring it aligns correctly.
- Reattach the pan with the new gasket to the transmission, tightening the bolts in a crisscross pattern to avoid warping.
- Refill with the appropriate transmission fluid.
Always check for any leaks after replacing the gasket.
Sealing Techniques
If the leak is from a seal, like the input or output shaft seal, follow these steps:
- Access the leaking seal by removing the necessary components, such as the driveshaft for an output seal.
- Use a seal puller to remove the old leaking seal.
- Clean the area thoroughly, ensuring no debris remains.
- Lubricate the new seal lightly with transmission fluid.
- Carefully press the new seal into place, ensuring it is seated evenly.
- Reassemble any removed components.
Tip: Always use seals and gaskets designed for your specific vehicle model to ensure a proper fit and seal.
After repairs, test drive the vehicle to ensure the leak has been effectively addressed and double-check for any residual leaks.
Fixing the Transmission Pan
Removing the Pan
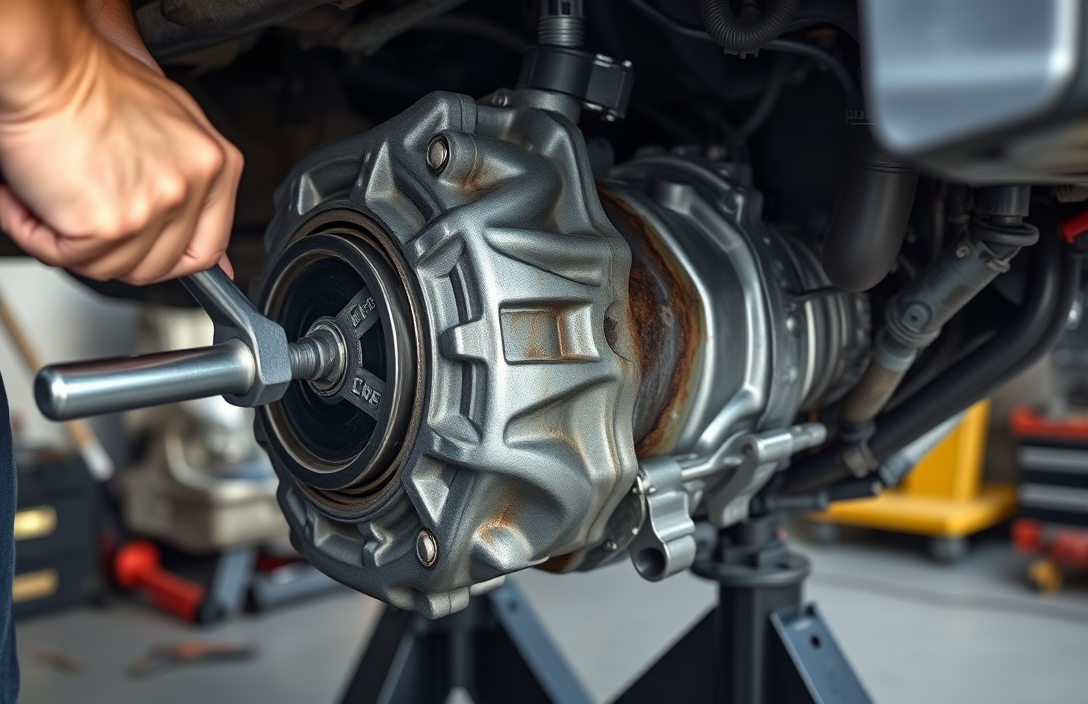
To fix a transmission leak from the pan, start by safely lifting the vehicle and securing it on jack stands. Place a drain pan underneath the transmission. Carefully unscrew the bolts on the transmission pan, typically using a socket wrench. Loosen the bolts gradually, starting from the corners and working towards the center. Allow the fluid to drain completely before removing the pan entirely.
Installing a New Gasket
Once the pan is off, clean the pan and the transmission housing surface thoroughly using a gasket scraper to remove old gasket material and debris. Apply a thin layer of transmission fluid on a new gasket to help seal it. Position the gasket on the pan, ensuring it’s aligned with the bolt holes. Some gaskets might have adhesive backing to help keep them in place during installation.
Reattaching the Pan
Align the pan and gasket with the transmission, starting the bolts by hand to avoid cross-threading. Tighten the bolts gradually in a crisscross pattern to ensure even pressure on the gasket, using a torque wrench to match your vehicle’s specifications. This step is essential to prevent new leaks.
Tip: Always check the manufacturer’s specifications for the correct bolt torque settings. Over-tightening can damage the gasket.
Once secured, refill the transmission with the appropriate type and amount of fluid as specified in your vehicle’s manual. Run the engine and check for leaks while the vehicle is still elevated. If everything looks good, lower the vehicle and take it for a short drive to confirm the repair.
Addressing Fluid Line Leaks
Inspecting Fluid Lines
Start by parking your vehicle on a flat surface and turning off the engine. Ensure the transmission is cool before proceeding. You’ll want to get under the vehicle safely, so use jack stands to support it securely.
Inspect the transmission fluid lines for any visible signs of wear or damage. Look for cracks, splits, or any areas where fluid may be seeping. Pay close attention to the connections at both ends of the lines, as these are common leak points.
Repairing or Replacing Lines
If you find minor damage, such as a small crack, you can use a rubber hose and clamps as a temporary repair. Cut the damaged section of the line, slip the rubber hose over the cut ends, and secure it with clamps. This should hold until a permanent fix can be arranged.
For more significant damage or if the lines have multiple leaks, it’s best to replace them entirely. Follow these steps:
- Disconnect the Lines: Use a wrench to unscrew the fittings at both ends of the line. Be prepared for some fluid to spill during this process.
- Remove the Old Line: Carefully take out the damaged line, ensuring not to damage any surrounding components.
- Install the New Line: Position the new line in place, matching it to the old line’s path. Secure it with the fittings, ensuring they are tight to prevent leaks.
After replacing or repairing the lines, check the transmission fluid level and top it up if necessary. Start the engine and monitor for any leaks. If everything looks good, you’ve successfully addressed the fluid line leaks!
Testing and Maintenance
Testing for Leaks
Once you’ve repaired your transmission, it’s time to ensure the leaks have been properly addressed. Here’s how you can check for leaks effectively:
- Visual Inspection: After running the engine for a few minutes, inspect the area around the transmission. Look for any fresh fluid drips or wet spots.
- Check Fluid Levels: Use the dipstick to check the transmission fluid level. Ensure it is within the recommended range. If it drops quickly after filling, there might be a leak.
- Cardboard Test: Place a large piece of cardboard under the vehicle overnight. Check for any fluid spots in the morning to locate potential leaks.
- UV Dye Test: Add a small amount of UV dye to the transmission fluid. Use a UV light to detect any leaks, which will glow under the light.
Routine Maintenance Tips
Regular maintenance can prevent future transmission leaks and extend the life of your transmission. Consider these tips:
- Regular Fluid Checks: Check the transmission fluid level and condition at least once a month. The fluid should be clear and reddish; if it appears dark or burnt, consider a change.
- Scheduled Fluid Changes: Change the transmission fluid according to your vehicle’s maintenance schedule, typically every 30,000 to 60,000 miles. This helps remove contaminants that can damage seals.
- Monitor for Symptoms: Pay attention to any unusual sounds, slipping gears, or delays in shifting. These can be signs of transmission issues that need immediate attention.
- Seal Condition: During regular inspections, check the condition of transmission seals and gaskets, replacing any that appear worn or damaged.
“Prevention is better than cure. Regular checks can save you from costly repairs down the road.”
Quick Summary
- Inspect the transmission fluid level and quality regularly to identify leaks early. Low fluid levels or burnt-smelling fluid can indicate a leak.
- Check the transmission pan gasket for wear or damage, as it is a common source of leaks. If compromised, replace it with a new gasket.
- Examine the transmission seals, such as input and output shaft seals, for signs of leaks. Replace any seals that show signs of wear or damage.
- Look for cracks or damage in the transmission case, which can lead to leaks. A professional repair or replacement might be necessary if the case is damaged.
- Tighten loose transmission pan bolts, but avoid over-tightening as it can damage the gasket, causing more leaks.
- Use a transmission stop leak product as a temporary fix. However, it’s best to address the root cause of the leak for a permanent solution.
- Regular maintenance and timely repair of small issues can prevent major leaks and extend the life of your transmission.
Frequently Asked Questions
How can I identify the source of a transmission leak?
Look for signs of red or brown fluid under your vehicle. Check around the transmission pan, fluid lines, and seals. If the fluid is leaking from these areas, it’s time to inspect or replace the faulty part.
What tools do I need to fix a transmission leak?
You’ll need a socket set, a wrench, a drain pan, and possibly a gasket scraper. These tools help you remove and replace transmission parts efficiently.
Is it safe to drive with a transmission leak?
Driving with a transmission leak isn’t recommended as it can lead to low fluid levels, causing damage to your transmission. Address the leak as soon as possible to avoid costly repairs.
How often should I check my transmission fluid?
Check your transmission fluid every month or as recommended by your vehicle’s manual. Regular checks help you catch leaks early and maintain proper fluid levels.
What should I do if the transmission leak persists after repairs?
If the leak continues, it might indicate a deeper issue. Consider consulting a professional mechanic to diagnose and fix the problem effectively.
- Find the Right Engine Oil for Your Car: A Quick Guide - March 1, 2026
- Car Battery Booster Basics: Start Your Vehicle in Minutes - March 1, 2026
- How Long Does It Take To Charge A Motorcycle Battery Charging Time Guide - February 28, 2026
