How To Install A Trailer Brake Step-by-step Guide For Diy Enthusiasts
Thinking about installing a trailer brake yourself? Whether you’re gearing up for a road trip or simply looking to enhance your vehicle’s safety, installing a trailer brake can make a world of difference in towing control.
You’ll need the right tools, a trailer brake controller, and careful attention to detail to successfully complete this task. Follow along to ensure a seamless installation process.
Understanding Trailer Brake Systems
Installing a trailer brake system can enhance safety and control. Understanding the components of these systems is the first step to a successful installation.
Types of Trailer Brakes
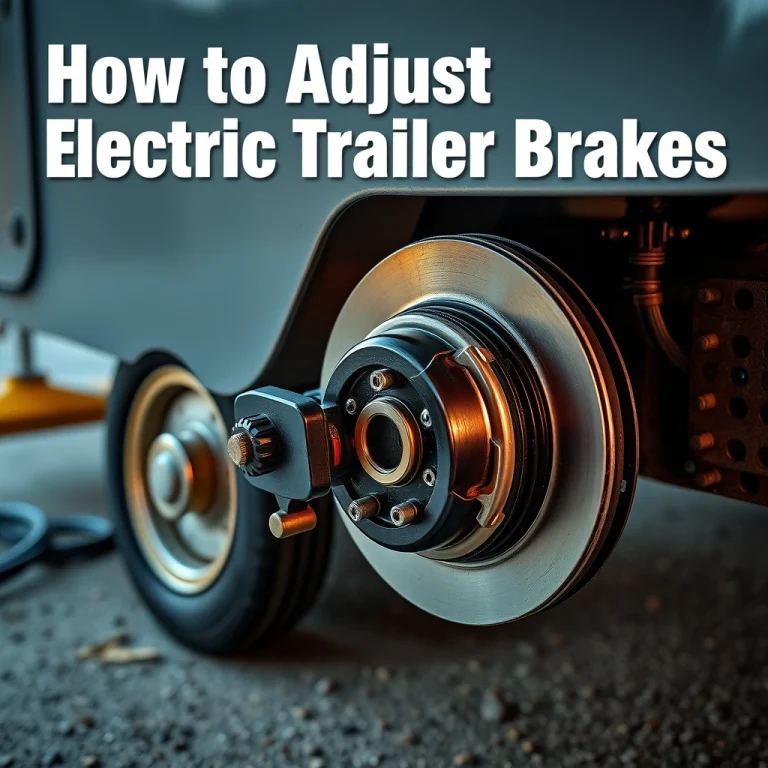
Trailer brakes generally fall into two categories: electric brakes and surge brakes. Electric brakes are activated by an electric signal from the brake controller in the towing vehicle. On the other hand, surge brakes are hydraulic and activate when the towing vehicle slows down.
Brake Controller Basics
A brake controller is an essential component when using electric brakes. It sends signals to the trailer brakes to engage them in sync with your vehicle’s brakes. A typical brake controller comes with adjustable settings to suit different trailer weights and road conditions.
When selecting a brake controller, consider these factors:
- Type: Choose between proportional or time-delayed controllers. Proportional controllers offer smooth braking, while time-delayed controllers are simpler and more affordable.
- Compatibility: Ensure the controller is compatible with your towing vehicle and trailer.
Tip: Always refer to your trailer and vehicle’s manuals for specific requirements and recommendations.
Installing a trailer brake system involves: mounting the brake controller inside your vehicle, wiring it to the vehicle’s electrical system, and connecting it to the trailer’s brake system. Taking the time to understand these components will make the installation process smoother and safer.
Gathering Necessary Tools and Materials
Essential Tools
Before installing a trailer brake, ensure you have the following tools to make the process smooth and efficient:
- Wire Stripper/Cutter: Essential for trimming and stripping wires to the correct lengths.
- Crimping Tool: Helps in securing connectors to the wires.
- Drill and Drill Bits: Needed for making holes to mount the brake controller.
- Screwdrivers: Both flathead and Phillips screwdrivers are useful for securing screws and other hardware.
- Socket Set: Required for tightening nuts and bolts during installation.
- Multimeter: Useful for checking connections and ensuring proper voltage.
Required Materials
In addition to tools, gather these materials to complete the installation:
- Trailer Brake Controller: The main component that modulates the brake force.
- Wiring Harness: Connects the brake controller to the vehicle’s electrical system.
- Mounting Brackets and Hardware: Used for securely mounting the brake controller inside the vehicle.
- Electrical Tape: For insulating wire connections and preventing short circuits.
- Wire Connectors: Such as butt connectors or quick splices for joining wires.
- Fuse and Fuse Holder: Protects the circuit from overcurrent.
- Zip Ties: Keep wires organized and secure.
Tip: Double-check your vehicle’s manual to ensure compatibility with the chosen brake controller and wiring harness.
Preparing the Vehicle for Installation
Inspecting Vehicle Compatibility
Before you start installing a trailer brake, ensure that your vehicle is compatible with the brake controller. Check your vehicle’s manual to see if it has a pre-installed towing package or wiring harness. This can simplify the installation process significantly. If your vehicle lacks these features, you may need additional wiring kits specific to your make and model.
Safety Precautions
Safety is paramount when working on any vehicle. Here’s a checklist to ensure a safe working environment:
- Disconnect the battery: Always disconnect the negative terminal of the battery to prevent electrical shocks or short circuits.
- Use proper tools: Ensure you have the necessary tools, such as wire strippers, crimpers, and a multimeter, for testing circuits.
- Work in a well-ventilated area: If you’re working inside a garage, make sure there’s adequate ventilation.
- Wear protective gear: Safety glasses and gloves can protect against sharp edges and debris.
Following these steps will help you prepare your vehicle safely and efficiently. Once you’ve ensured compatibility and taken all safety precautions, you’ll be ready to move on to the installation phase.
Installing the Brake Controller
Mounting the Controller
To install your brake controller, first determine a suitable location. The controller should be within easy reach of the driver for adjustments. Common places include beneath the dashboard or near the steering column. Once you’ve chosen the spot, use the mounting bracket provided with your brake controller kit. Secure it with screws, ensuring it is stable and doesn’t obstruct any vehicle controls.
Wiring the Controller
Wiring the brake controller involves connecting it to your vehicle’s electrical system. Follow these steps:
- Identify the wires: Typically, there are four wires on the brake controller: red (brake light), blue (output to trailer), white (ground), and black (battery power).
- Connect the ground: Attach the white wire to a clean, rust-free metal surface of your vehicle’s chassis.
- Battery connection: Connect the black wire to the positive terminal of the vehicle’s battery. It’s advisable to use an in-line fuse or circuit breaker to protect the circuit.
- Brake light connection: Splice the red wire into the cold side of the brake light switch on the brake pedal. This allows the controller to activate when the brakes are applied.
- Output to trailer: Run the blue wire from the controller to the 7-way connector at the rear of your vehicle, which connects to the trailer’s braking system.
Tip: Use a multimeter to verify connections and ensure all wires are secure and well-insulated to prevent shorts.
Connecting the Trailer Wiring
Identifying Trailer Wiring
Start by locating the trailer connector on your vehicle. This is typically a 7-pin connector near the rear bumper. Ensure that both the vehicle and trailer wiring systems are compatible. The 7-pin system is standard for brake controllers, but verify if your setup requires an adapter.
Attaching Wiring Harness
Follow these steps to connect the trailer wiring:
- Disconnect Battery: Before making any electrical connections, disconnect the negative terminal of your vehicle’s battery to prevent any accidental shorts.
- Connect the Harness: Plug the trailer wiring harness into the vehicle’s connector. Ensure each pin aligns correctly to avoid mismatched connections.
- Secure the Connection: Use dielectric grease on the connectors to protect against moisture and corrosion. Secure the connection with a zip tie to prevent it from coming loose during travel.
Tip: If your vehicle lacks a factory-installed brake controller, you may need to purchase an aftermarket unit. Follow the manufacturer’s instructions for proper installation.
Checking Connections
Reconnect the battery and test the trailer lights and brake system. Have someone assist you to ensure brake lights and turn signals respond correctly. Adjust the brake controller settings, if applicable, for optimal performance.
“Testing ensures all systems function correctly, providing safety and reliability on the road.”
Testing the Trailer Brake System
Initial Test Procedures
After installing your trailer brake system, it’s essential to ensure that everything is functioning correctly. Start by connecting your trailer to your vehicle, making sure all electrical connections are secure. Then, perform the following tests:
- Power Check: Turn on your vehicle and verify that the brake controller powers up correctly. The display should light up, showing the device is active.
- Brake Activation: Press the manual override lever on the brake controller. You should feel the trailer brakes engage. If there’s no response, check the wiring and ensure all connections are tight.
- Brake Light Test: Have someone stand behind the trailer and apply the vehicle brakes. Ensure that the trailer’s brake lights illuminate correctly.
Adjusting Brake Settings
Once you confirm the brakes are working, adjust the settings for optimal performance:
- Gain Setting: Adjust the gain on the brake controller. Start with a lower setting, then slowly increase until the trailer brakes engage firmly without locking up. This ensures smooth braking.
- Load Test: Test the brakes under load by driving slowly in a safe area. Apply the brakes and assess their responsiveness. Adjust the gain as needed for different load weights.
- Fine-Tuning: If the brakes feel too aggressive or too soft, continue to tweak the gain setting until you achieve a balanced feel.
Tip: Regularly check all connections and settings, especially before long trips, to ensure consistent brake performance.
Troubleshooting Common Issues
Brake Controller Errors
Brake controller issues can often arise due to improper settings or faulty connections. If you’re seeing error messages or experiencing inconsistent braking:
- Check Connections: Ensure that all wires are securely connected to the brake controller, battery, and trailer plug. Loose connections are a common cause of errors.
- Calibrate: Some controllers require calibration. Refer to the manual to ensure it’s correctly set up for your vehicle and trailer.
- Software Update: If your controller is digital, check for any available software updates that might resolve known issues.
Wiring Problems
Wiring issues can lead to brake failure or erratic performance. Here’s how to address them:
- Inspect for Damage: Check wires for cuts, frays, or corrosion. Replace any damaged sections to ensure a reliable connection.
- Correct Gauge Wire: Using the wrong wire gauge can cause overheating and failure. Ensure you’re using the recommended wire size from the installation guide.
- Grounding: Poor grounding is a frequent cause of electrical issues. Ensure the ground wire is securely connected to a clean, bare metal surface on both the trailer and vehicle.
If problems persist, consider consulting with a professional to ensure safety and proper functioning. Regular maintenance checks can prevent many of these issues from occurring.
Maintenance Tips for Trailer Brakes
Regular Inspection
To maintain your trailer brakes, start with regular inspections. Check the brake pads and shoes for wear and tear. Replace them if they appear thin or unevenly worn. Inspect the brake drums and rotors for cracks or deep grooves, as these can affect braking performance. Also, ensure the brake lines and hoses are free from leaks or signs of deterioration.
Cleaning and Lubrication
Cleaning your trailer brake components is essential for longevity. Use a brake cleaner to remove dust and debris from the brake assemblies. Avoid using water, as it can cause rust. After cleaning, lubricate all moving parts, including the caliper slides and the brake adjusters, with a high-temperature brake grease. This reduces friction and prevents premature wear.
Tip: Always check the trailer brake controller’s settings in your towing vehicle. Ensure the gain is set correctly to match the trailer’s load for effective braking performance.
Quick Summary
- Gather necessary tools and materials, including a brake controller, wiring harness, and basic hand tools.
- Identify the location for the brake controller, usually under the dashboard within easy reach of the driver.
- Connect the wiring harness to the vehicle’s brake system by following the specific color-coded wires for power, ground, brake signal, and trailer brake output.
- Secure the brake controller in place using screws or brackets, ensuring it is stable and accessible.
- Test the installation by connecting a trailer and adjusting the controller settings based on trailer weight and braking requirements.
- Double-check all connections and ensure no loose wires or exposed parts that might cause issues.
- Consult the brake controller manual for any specific setup or calibration instructions unique to the model.
Frequently Asked Questions
What tools do I need to install a trailer brake?
You’ll need a basic set of tools including a drill, screwdrivers, wire cutters, and a wiring kit. A circuit tester is also handy to ensure all connections are secure.
How do I know if my vehicle is compatible with a trailer brake?
Check your vehicle’s manual to see if it supports an electric brake controller. Most modern vehicles with towing capabilities will have a plug-and-play option.
Where should I mount the brake controller in my vehicle?
Mount the brake controller within easy reach of the driver, usually under the dashboard on the driver’s side. Ensure it’s secured and doesn’t obstruct any vehicle controls.
Can I install a trailer brake myself, or should I hire a professional?
If you’re comfortable with basic electrical work and have the right tools, you can install it yourself. However, if you’re unsure, it might be safer to hire a professional to ensure everything is connected correctly.
What should I do if the trailer brake isn’t working after installation?
Double-check all connections and make sure the wiring is secure. Use a circuit tester to verify the electrical flow. If problems persist, consult the installation manual or seek professional help.
- Find the Right Engine Oil for Your Car: A Quick Guide - March 1, 2026
- Car Battery Booster Basics: Start Your Vehicle in Minutes - March 1, 2026
- How Long Does It Take To Charge A Motorcycle Battery Charging Time Guide - February 28, 2026