How To Test Camshaft Position Sensor Diy Guide For Car Enthusiasts
Is your engine misfiring or running rough? A faulty camshaft position sensor might be the culprit. This essential component ensures your engine’s timing is spot on, making it crucial for smooth operation.
Testing a camshaft position sensor involves checking voltage, resistance, and signal output. Follow these steps to diagnose issues accurately and keep your vehicle running smoothly.
Understanding the Camshaft Position Sensor

Function of the Sensor
The camshaft position sensor plays a crucial role in your vehicle’s engine management system. It is responsible for monitoring the position of the camshaft and sending this data to the engine control unit (ECU). This information is vital for determining the timing of the ignition and fuel injection, ensuring your engine runs smoothly and efficiently.
Common Symptoms of Failure
Recognizing the symptoms of a failing camshaft position sensor can help you troubleshoot issues early. Some common signs include:
- Check Engine Light: This may illuminate on your dashboard due to sensor failure.
- Engine Misfires: A faulty sensor can disrupt the timing, leading to misfires.
- Poor Acceleration: Inconsistent signal can affect power delivery.
- Starting Problems: Your engine might struggle to start or not start at all.
Tip: If you notice any of these symptoms, it’s wise to test the sensor to confirm if it’s the cause.
Tools Required for Testing
Testing a camshaft position sensor requires a few specific tools. Having the right equipment ensures you can accurately diagnose any issues with the sensor, which plays a crucial role in your engine’s performance.
Multimeter
The multimeter is an indispensable tool for testing the camshaft position sensor. It helps measure the sensor’s voltage, resistance, and continuity. Here’s what you need to do:
- Voltage Check: Set the multimeter to the voltage setting. Connect it to the sensor’s connector and check for the specified voltage range in your vehicle’s manual. This confirms that the sensor is receiving power.
- Resistance Test: Switch the multimeter to resistance mode. Measure the resistance across the sensor’s terminals. Compare your reading with the manufacturer’s specifications to determine if the sensor is functioning correctly.
- Continuity Test: Use the continuity setting to ensure there are no breaks in the sensor’s internal wiring.
OBD-II Scanner
An OBD-II scanner is useful for reading trouble codes and monitoring real-time sensor data. Here’s how it can assist you:
- Trouble Codes: Connect the scanner to your vehicle’s OBD-II port. Retrieve any stored trouble codes that may indicate sensor issues, such as P0340 for camshaft position sensor malfunction.
- Live Data: Access the live data feature to monitor the sensor’s output in real time. This helps verify if the sensor is sending accurate signals to the vehicle’s computer.
These tools not only aid in diagnosing a faulty camshaft position sensor but also save time and effort by ensuring precise measurements and data retrieval.
Locating the Camshaft Position Sensor

Checking the Vehicle Manual
To locate the camshaft position sensor, your first step should be to consult the vehicle’s manual. This document is a valuable resource as it provides diagrams and specific locations for various components. Look for sections related to engine components or sensors. This can save you time and provide a clear understanding of where to look under the hood.
Typical Sensor Locations
In many vehicles, the camshaft position sensor is located near the top of the engine, often around the cylinder head, the valve cover, or on the engine block itself. Here’s a quick guide to common locations:
- Front of the Engine: Some sensors are positioned at the front, making them easier to access. Look around the timing cover or near the crankshaft pulley.
- Side of the Engine: In some models, the sensor is mounted on the side of the engine. This can be on either the driver’s or passenger’s side, depending on the engine layout.
- Rear of the Engine: For some vehicles, particularly those with transverse-mounted engines, the sensor may be found at the back, closer to the firewall.
Remember, the exact location can vary based on the make, model, and year of your vehicle. If the manual or a quick visual inspection doesn’t help, consider searching online forums specific to your vehicle or contacting a dealership for guidance.
Tip: Before you start, disconnect the battery to ensure safety while working near the engine components.
Preparing for the Test
Safety Precautions
Before diving into testing your camshaft position sensor, ensure you’re working in a safe environment. Wear appropriate safety gear, such as gloves and protective eyewear, to prevent any injuries. Make sure your vehicle is parked on a flat surface and the parking brake is engaged to prevent any unexpected movement.
Disconnecting the Battery
To avoid any electrical shocks or damage to your vehicle’s electrical system, it’s essential to disconnect the battery before starting. Follow these steps:
- Locate the battery under the hood of your vehicle.
- Using a wrench, loosen the nut on the negative terminal (usually marked with a minus sign or black cover).
- Carefully remove the cable from the terminal and set it aside, ensuring it doesn’t accidentally touch the battery again.
Gather Necessary Tools
Having the right tools on hand will make the process smoother. You will need:
- Multimeter (to test the sensor’s voltage and resistance)
- Socket set (for removing any components if necessary)
- Vehicle repair manual (for specific instructions related to your car model)
Tip: Keep a notepad and pen nearby to jot down readings from your multimeter for later reference.
With these preparations in place, you’re ready to move on to the testing phase. Ensuring these steps are completed will help protect your vehicle and yourself while providing accurate test results.
Performing a Visual Inspection

Checking for Physical Damage
Start by locating the camshaft position sensor in your vehicle. It is typically mounted near the timing cover or cylinder head. Once you’ve found it, inspect the sensor’s body for any visible damage such as cracks or wear. If the sensor appears physically damaged, it might not function properly and may need replacement.
Inspecting Electrical Connectors
The next step is to examine the sensor’s electrical connectors. Disconnect the wiring harness from the sensor and look for any signs of corrosion or broken pins. Clean any dirt or debris from the connector with a soft brush or compressed air. Ensure the connector fits snugly when re-attached, as loose connections can lead to signal issues.
Tip: Use dielectric grease on the connectors before reassembling to protect against moisture and corrosion.
By performing a thorough visual inspection, you can identify obvious issues that might affect the camshaft position sensor’s performance. If everything looks intact and clean, you can proceed to testing the sensor’s functionality with a multimeter or scanner tool.
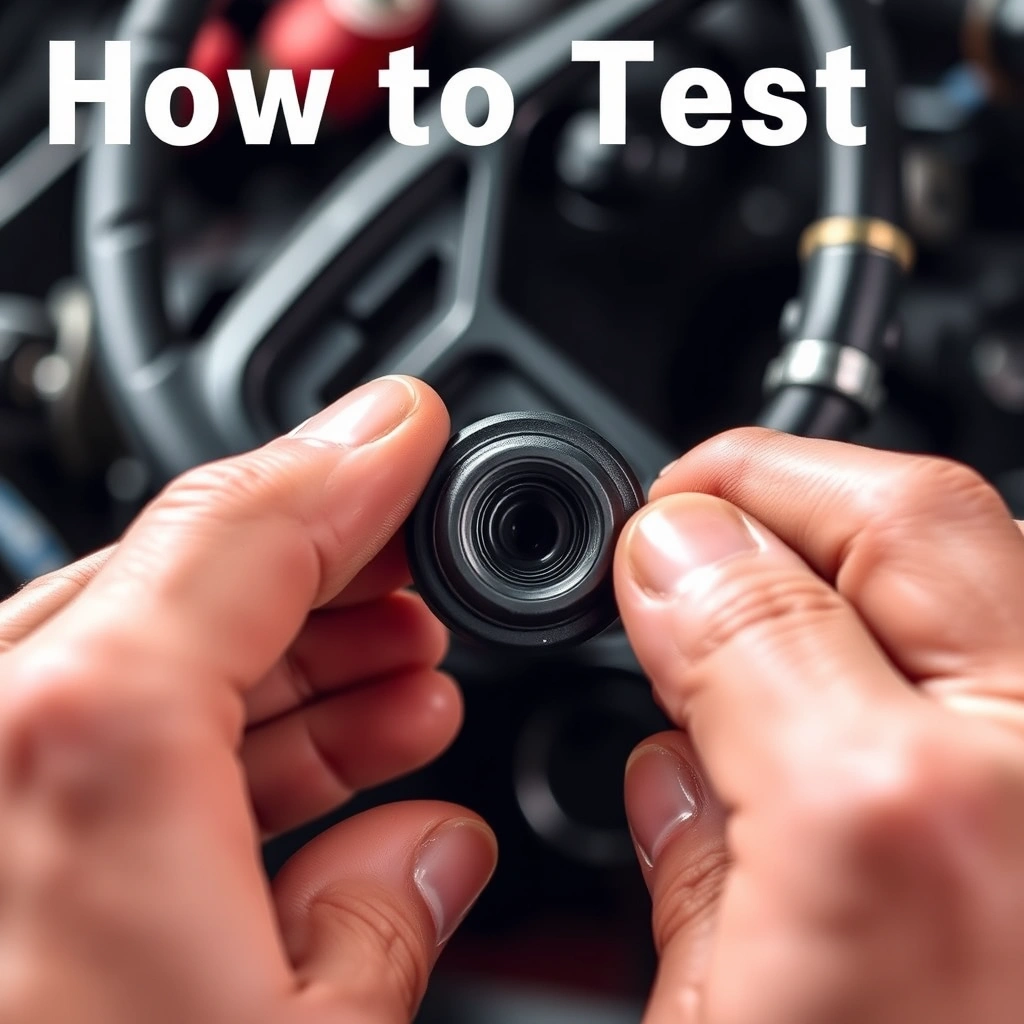
Testing with a Multimeter
Setting Up the Multimeter
To start testing the camshaft position sensor, you need to set up your multimeter correctly. Begin by turning the multimeter dial to the resistance setting, often denoted by the Greek letter omega (Ω). This setting allows you to measure the sensor’s resistance, which is a key indicator of its functionality.
Ensure your vehicle is off, and the key is removed from the ignition. Safety is paramount, so disconnect the battery to avoid any accidental shorts or shocks. Locate the camshaft position sensor, typically found near the engine’s camshaft, and disconnect its electrical connector.
Measuring Sensor Resistance
With the multimeter set up, it’s time to measure the sensor’s resistance:
- Connect the multimeter probes to the sensor’s terminals. It doesn’t matter which probe goes on which terminal when measuring resistance.
- Take note of the resistance reading displayed on the multimeter screen. A typical camshaft position sensor should have a resistance between 200 and 1,500 ohms, but always refer to your vehicle’s service manual for specific values.
- If the resistance is outside the specified range, the sensor may be faulty and require replacement.
Tip: If the multimeter shows infinite resistance or zero, the sensor might be internally shorted or open, indicating a need for replacement.
After testing, reconnect the sensor and the battery. This simple test can confirm whether the camshaft position sensor is functioning correctly or if it’s contributing to any engine performance issues you’re experiencing.
Using an OBD-II Scanner
Reading Error Codes
Connect your OBD-II scanner to the vehicle’s diagnostic port, typically located under the dashboard on the driver’s side. Turn the ignition to the ‘on’ position without starting the engine. The scanner will communicate with the car’s computer to retrieve error codes.
Look for codes related to the camshaft position sensor, such as P0340, P0341, or similar. These codes indicate a problem with the sensor’s circuit or signal.
Interpreting the Results
Once you have the error codes, consult your vehicle’s service manual or online resources to understand what each code means for your specific car model. This will help determine if the camshaft position sensor is faulty or if there might be a related wiring issue.
If the codes suggest a sensor fault, inspect the camshaft position sensor and its wiring for physical damage, loose connections, or corrosion. Often, a simple cleaning or securing of connectors can resolve issues.
Tip: If the error persists after addressing physical issues, consider testing the sensor’s electrical output with a multimeter or replacing it if necessary.
Interpreting Test Results and Next Steps
Understanding Test Outcomes
After testing your camshaft position sensor, you’ll likely encounter one of three scenarios:
- Normal Functioning: If the sensor’s voltage reading is within the manufacturer’s specified range and changes smoothly with engine speed, it’s functioning correctly.
- Faulty Sensor: If the voltage is erratic or doesn’t change with engine speed, the sensor might be faulty. Double-check connections and retest to confirm.
- No Signal: A zero or constant reading indicates a possible wiring issue or a completely failed sensor.
Deciding on Repair or Replacement
Depending on your findings, consider the following steps:
- If functioning normally: No further action is needed. Regular checks can prevent future issues.
- If faulty: Try cleaning the sensor and checking the wiring connections. Sometimes dirt or loose connections cause false readings.
- If no signal: Inspect the wiring harness and connectors for damage. Repair any issues or replace the sensor if needed.
Tip: Always consult your vehicle’s repair manual for specific instructions and torque settings when replacing parts.
Once repairs or replacements are done, retest to ensure the problem is resolved. If issues persist, it may be wise to consult a professional for further diagnostics.
Quick Summary
- Identify symptoms of a faulty camshaft position sensor, such as engine misfires, poor acceleration, or difficulty starting the vehicle.
- Disconnect the sensor’s electrical connector to test its resistance using a multimeter, ensuring the readings align with the manufacturer’s specifications.
- Inspect the sensor for physical damage or debris that may affect its performance.
- Conduct a voltage test while the engine is running to check the sensor’s signal output, comparing results with expected voltage ranges.
- Ensure all connections are clean and secure to prevent faulty readings or intermittent issues.
- If the sensor is faulty, replace it with a new one, following safety precautions and manufacturer guidelines during installation.
- After replacement, clear any error codes from the vehicle’s computer system to verify the solution’s effectiveness.
Frequently Asked Questions
How can I tell if my camshaft position sensor is faulty?
Common signs of a faulty camshaft position sensor include engine misfires, poor acceleration, and trouble starting the vehicle. Additionally, the check engine light may illuminate if the sensor is failing.
What tools do I need to test a camshaft position sensor?
You’ll need a multimeter to test the sensor’s voltage and resistance. Having a vehicle repair manual specific to your car model can also be helpful for identifying wiring and specifications.
Can I drive with a bad camshaft position sensor?
While you may be able to drive with a failing sensor, it’s not advisable. A faulty sensor can lead to engine performance issues and may cause further damage if not addressed promptly.
Where is the camshaft position sensor located?
The camshaft position sensor is typically located near the engine’s camshaft, either at the front or rear of the engine. Its exact location can vary based on the make and model of your vehicle.
How do I test the camshaft position sensor with a multimeter?
First, disconnect the sensor from the car’s wiring harness. Set the multimeter to measure resistance or voltage as needed, then connect the multimeter probes to the sensor terminals to check for proper readings according to your vehicle’s specifications.
- Find the Right Engine Oil for Your Car: A Quick Guide - March 1, 2026
- Car Battery Booster Basics: Start Your Vehicle in Minutes - March 1, 2026
- How Long Does It Take To Charge A Motorcycle Battery Charging Time Guide - February 28, 2026